How to Set Up a Birthday Balloon Arch at Home (Step-by-Step)
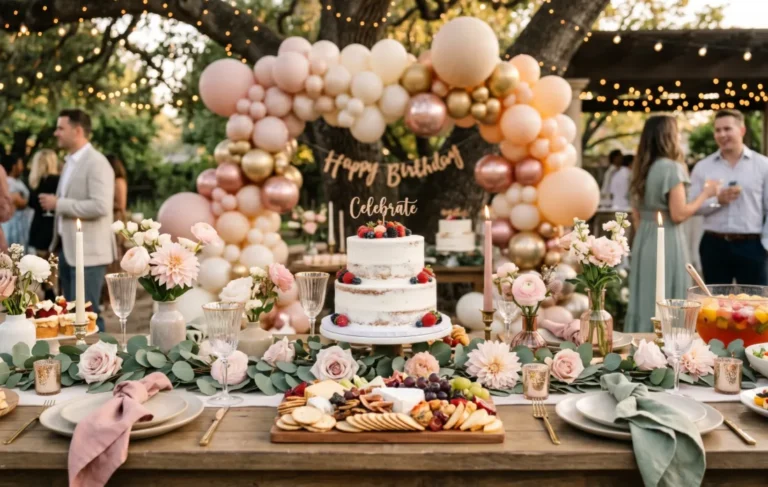
You see them everywhere. Birthday parties. Backdrops for cake cutting photos. Front doors decorated for surprise parties. A balloon arch instantly transforms any space from “ordinary living room” to “celebration venue.”
And here is what most people do not realize: you can build one at home, in under two hours, for less than most people spend on a birthday cake.
This guide covers the entire process, from picking your balloon colours to hanging the finished arch and keeping it looking full through the party. No party planner experience needed. If you can blow up a balloon, you can do this.
Choose Your Arch Style First
Before buying a single balloon, decide which type of arch you are building. They look similar in photos but require different supplies.
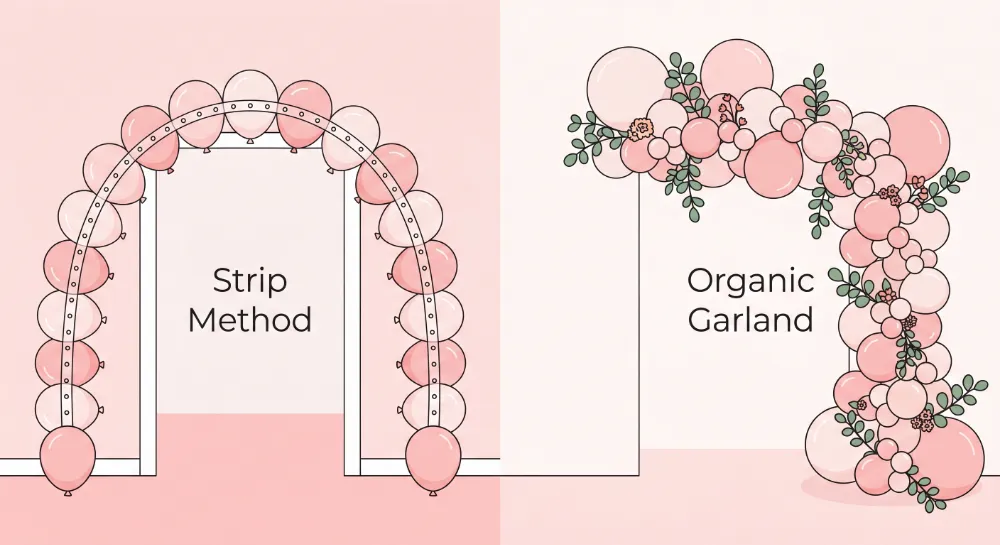
1. The Balloon Strip Method (Easiest for Beginners)
This uses a perforated plastic decorating strip that acts as the spine of your arch. You push balloon necks through the holes, and the strip holds everything together. It is the fastest method and gives you a clean, structured arch shape.
Best for: Doorways, walls, photo backdrops, and anywhere you need a neat defined curve.
2. The Organic Garland Method (Fuller and More Luxurious)
Balloons are tied onto a long piece of fishing line or balloon tape using knots and glue dots. The result is an irregular, layered look that most people associate with high-end event styling. It takes slightly longer but requires no special strip.
Best for: Dessert table backdrops, ceiling installations, and parties where you want that professionally styled look.
PRO TIP
First-timers? Go with the strip method. You will finish faster and feel more confident. Once you have done one, the organic method is a natural next step.
What You Need: Complete Supplies List
Getting your supplies right before you start will save you two mid-project trips to the party store. Here is exactly what to gather.
| Item | What to Look For | Why It Matters |
|---|---|---|
| Latex balloons (11-inch) | High-quality brand like Qualatex or Sempertex | Cheap balloons burst easily and pop during the party |
| Latex balloons (5-inch) | Same brand, matching colours | Used to fill gaps and add depth at the end |
| Balloon decorating strip | Long roll with pre-punched holes, 6 feet or longer | The backbone of your arch structure |
| Electric balloon pump | Dual-nozzle style is fastest | Inflating 80+ balloons by mouth is exhausting and inconsistent |
| Glue dots or balloon glue | No-trace double-sided dots | Attaches small balloons to fill gaps cleanly |
| Command hooks (large) | Damage-free adhesive hooks rated 5 lbs+ | Holds the arch without drilling or leaving marks |
| Clear fishing line or ribbon | At least 20 lbs test if using fishing line | Ties arch ends to hooks or weighted buckets |
| Optional: large foil balloon | Number, star, or “Happy Birthday” shape | Becomes the centrepiece at the top of the arch |
How Many Balloons Do You Actually Need?
This is the question nobody answers clearly, so here is a practical guide:
- 4-foot arch (small table accent): 40 to 50 balloons
- 6-foot arch (standard doorway): 60 to 80 balloons
- 8-foot arch (wall backdrop): 90 to 120 balloons
- 10-foot+ arch (full room feature): 130 to 160 balloons
Always buy 20% more than you think you need. Popped balloons, uneven inflation, and gap-filling all eat into your count.
PRO TIP
Order balloons at least two days before the party. Inflating everything the night before reduces stress and gives you time to fix any sizing issues.
Plan Your Colour Scheme Before You Inflate a Single Balloon
This is where most first-time arches go wrong. People buy colours they love individually, then inflate them without a plan and end up with a patchy result.
Here are three colour arrangements that work reliably:
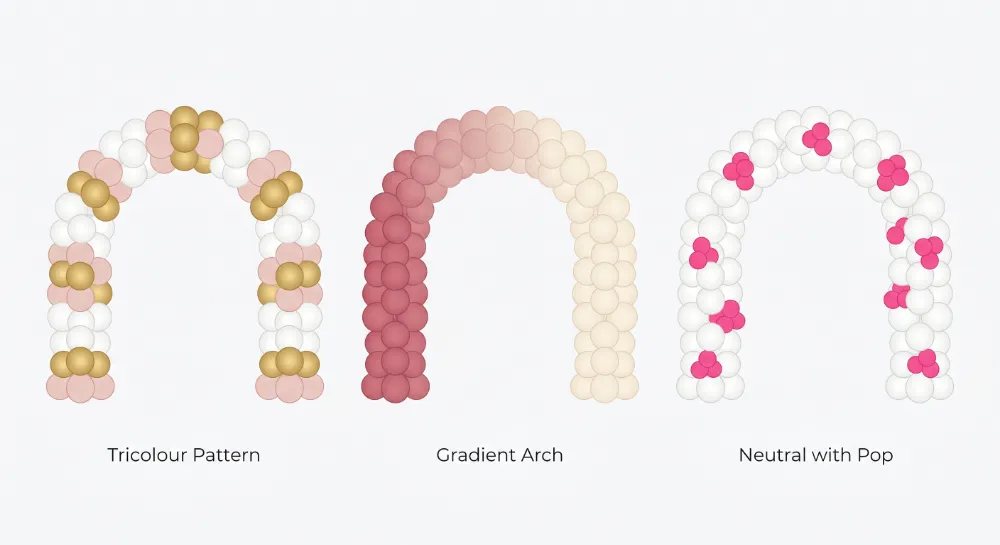
1. The Classic Tricolour Pattern
Pick three colours. Group them in repeating clusters of four, rotating through your palette as you go. For example: pink cluster, white cluster, gold cluster, repeat. Clean, balanced, always looks intentional.
2. The Gradient Arch
Start with your darkest colour on the left side. Move through a lighter shade in the middle. Finish with your lightest on the right. This requires some planning but creates a dramatic visual effect that photographs beautifully.
3. The Neutral with Pop Method
Use mostly white or cream balloons as the base. Add clusters of one bold accent colour, like hot pink or cobalt blue, every few sections. The accent colour pops against the neutral and looks more sophisticated than a full rainbow arch.
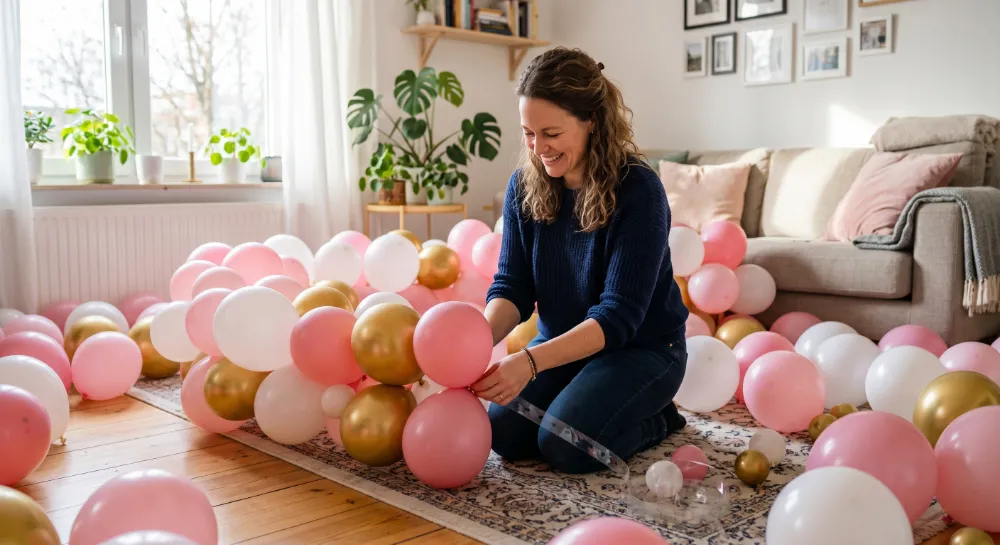
How to Build Your Birthday Balloon Arch: Step-by-Step
Clear a floor space before you start. You will be working with inflated balloons, and you need room to lay out the strip and move around without popping anything.
Step 01
Measure and Set Up Your Space
Decide exactly where the arch will go. Measure the width of the doorway, wall section, or backdrop area. If you are building a freestanding arch, measure the floor space available. Mark the two anchor points on the wall with a piece of tape. These are where your Command hooks will go.
Step 02
Inflate Your Balloons in Batches
Use your electric pump for the 11-inch balloons. Fill them to about 80% capacity, not fully inflated. Fully inflated balloons are hard to attach to the strip and much more likely to burst. Tie each balloon off with a simple overhand knot as close to the neck as you can. Inflate all your balloons before building so you can see how your colour layout looks as a group.
PRO TIP
Consistency is everything. Balloons that vary wildly in size make the arch look messy. If you have a balloon sizing gauge (a simple cardboard template with a hole), use it to keep your 11-inch balloons a similar diameter.
Step 03
Create Balloon Clusters (The Building Blocks)
Your arch is built from clusters of four balloons, not individual ones. Take two balloons of the same or similar colour and twist their necks together twice. Do the same with another pair. Then cross the two pairs over each other and twist once more. You now have a four-balloon cluster that stays together on its own. This is the fundamental unit of your entire arch.
Step 04
Attach Clusters to the Decorating Strip
Lay your balloon decorating strip flat on the floor. Push the tied neck of each balloon in a cluster through the holes in the strip. Most strips have holes at regular intervals, and you want roughly four balloons per section. Alternate your colour clusters as you go according to the scheme you planned. The strip will curve naturally as you add more balloons because the weight and tension pull it into shape.
Step 05
Add Balloons of a Second Size
Once your main clusters are on the strip, add some 5-inch or 9-inch balloons between the larger ones. These fill the visual gaps and give the arch that layered, dense look. Attach them using glue dots pressed onto the neck area of the smaller balloon, then press firmly against the base of a nearby cluster. Hold for five seconds.
Step 06
Hang the Arch
Press your Command hooks firmly to the wall at your marked anchor points. Let them sit for at least 30 minutes before applying weight. This is important. The adhesive needs time to bond fully. Once ready, hook the end of the decorating strip onto the first hook. Walk the arch into its curved shape and hook the other end. If the arch sags in the middle, use a third hook or a short piece of fishing line to pull the centre up toward the ceiling or wall.
PRO TIP
For a doorway arch, put a hook at each top corner of the door frame. For a wall backdrop, position hooks slightly higher than you think you need. Balloons and the strip itself have weight that will pull the arch lower than it looks when you first hang it.
Step 07
Fill Gaps and Add Finishing Touches
Step back and look at your arch from a few feet away. Identify any areas where you can see the strip or where the arch looks thin. Inflate 5-inch balloons and use glue dots to press them into these gaps. Keep them slightly under-inflated so they fit snugly between larger balloons without pushing others out of place. This final step is what separates a good arch from a great one. Take your time here.
How to Make It Look More Professional (Finishing Touches)
Once the structure is complete, a few additions make the arch look like it came from a professional decorator.
Add Greenery or Faux Flowers
Tuck stems of faux eucalyptus, greenery picks, or small silk flowers between balloon clusters. You can find these at any craft store or online for a couple of dollars per bunch. Push the stems gently into the gaps between balloons and let the leaves drape naturally. This softens the arch and makes it feel organic rather than stiff.
Include a Statement Centrepiece
Hang a large foil number balloon, a personalized name balloon, or a “Happy Birthday” bubble balloon at the top centre of the arch. Tie it with ribbon and loop the ribbon around the decorating strip so it sits at the peak. This gives every photo a clear focal point.
Place a Weighted Bucket at the Base
If you have balloons hanging at the bottom of the arch, fill a small decorative bucket with gravel or sand and tie the base balloon ribbon to the bucket handle. This keeps floor-level balloons from drifting and makes the whole structure look intentional.
Where to Display Your Balloon Arch
Placement makes a huge difference to how impressive the arch looks in person and in photos.
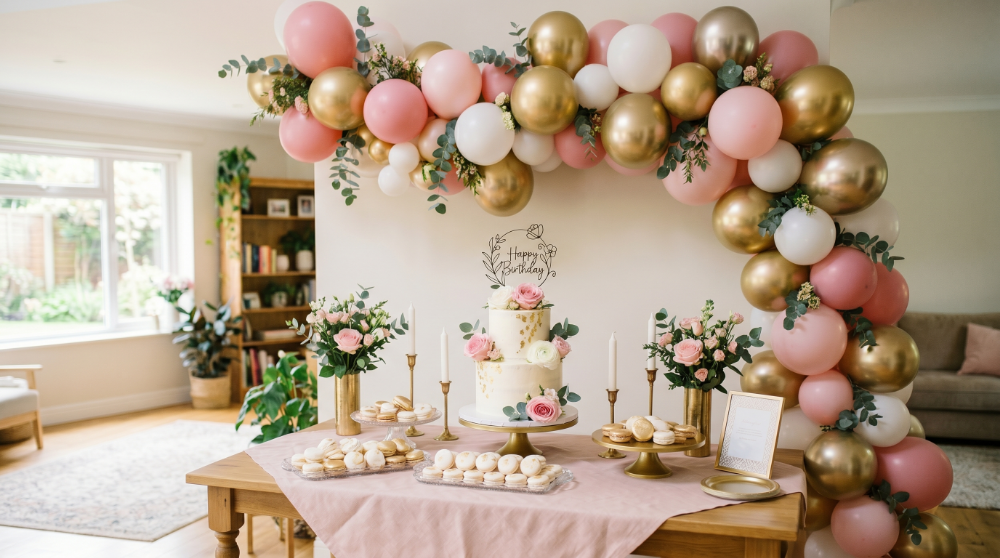
- Above the dessert or cake table: The arch frames the table and turns every photo taken there into a keepsake
- In a doorway or entry: Guests walk through it when they arrive, setting the mood from the moment they enter
- As a photo backdrop: Position a plain wall behind it and guests will naturally gravitate to it for photos throughout the party
- Above the gift table: Draws attention to the area and keeps everything looking festive
- Around the birthday person’s seat: Frames the guest of honour for group photos
Common Mistakes and How to Fix Them
1. The Arch Looks Flat or Thin
This usually means not enough balloons or clusters that are spaced too far apart. Fix it by making smaller clusters and packing them more tightly along the strip, and by using more 5-inch filler balloons in the gaps.
2. Balloons Keep Popping
You are likely over-inflating. Latex balloons should feel firm but still have a little give when you press them. If they feel rock-hard, let a tiny bit of air out before tying. Also keep the arch away from direct sunlight and heat sources, both of which expand the air inside and increase the risk of popping.
3. The Arch Sags in the Middle
Add a third anchor point at the top centre. Use a small Command hook and a short length of fishing line looped around the decorating strip to lift the midpoint. This is a standard fix even professional decorators use for longer arches.
4. The Colours Look Patchy or Random
This happens when clusters are attached without following a consistent pattern. If your arch is already up, add filler balloons in the dominant colour to areas that look off-balance. For future arches, lay your clusters out in order on the floor before attaching them to the strip so you can see the colour flow.
5. The Command Hooks are Coming Off the Wall
The adhesive strip needs a clean, smooth, non-porous surface to bond properly. If your wall is textured or painted with a matte finish, use painter’s tape over the hook area first, then press the Command strip onto that. Alternatively, use removable adhesive hooks designed for heavier loads.
Final Thoughts
A birthday balloon arch is one of those decorations that looks far more difficult than it is. Once you build your first one, you will wonder why you ever considered hiring someone to do it.
The strip method is forgiving. The clusters are quick to make. And the moment you hang the finished arch and step back to look at it, the effort feels completely worth it.
If your first arch is not perfect, add more filler balloons and greenery. Nobody at a birthday party is scrutinising balloon placement. They are taking photos, eating cake, and enjoying the celebration you created for them.
That is what it is all about.
Video Credits: Balloons and Business