How to Create a Wedding Table Layout That Seats Guests Comfortably
Bad seating ruins good weddings. Here’s a step-by-step guide to building a table layout that keeps every guest happy, from where the top table sits to how you handle those awkward family dynamics.
Why your table layout matters more than you think
Most couples spend months choosing flowers, cakes, and dresses. The seating plan? It gets squeezed into the last two weeks before the wedding.
That’s a mistake.
Your table layout is the invisible architecture of your reception. It controls the energy in the room. Seat two feuding cousins next to each other and the photos will show it. Put your elderly gran near the speakers and she’ll spend the evening miserable. Place a table of singles near the dance floor and the night will run itself.
A great seating layout does three things:
- Ensures every guest feels considered, not just placed
- Helps your catering team run service without chaos
- Keeps the flow of the room from speeches to dancing, natural and easy
This guide gives you a process. Not a vague checklist, but an actual method built from what works.
Start with your venue floor plan
Before you assign a single seat, get the floor plan from your venue. Ask for it early, ideally at the point of booking.
You need to know:
- The exact room dimensions
- Where the entrance, exits, and fire doors are
- Where the kitchen pass or serving stations are located
- The position of pillars, awkward corners, or low beams
- The location of the bar, dance floor, and DJ or band area
Every one of these affects where you can and cannot put tables.
PRO TIP
Ask your venue coordinator where the most popular table positions are. They’ve seen hundreds of receptions. They know which tables get the draught from the door and which seats face away from the speeches.
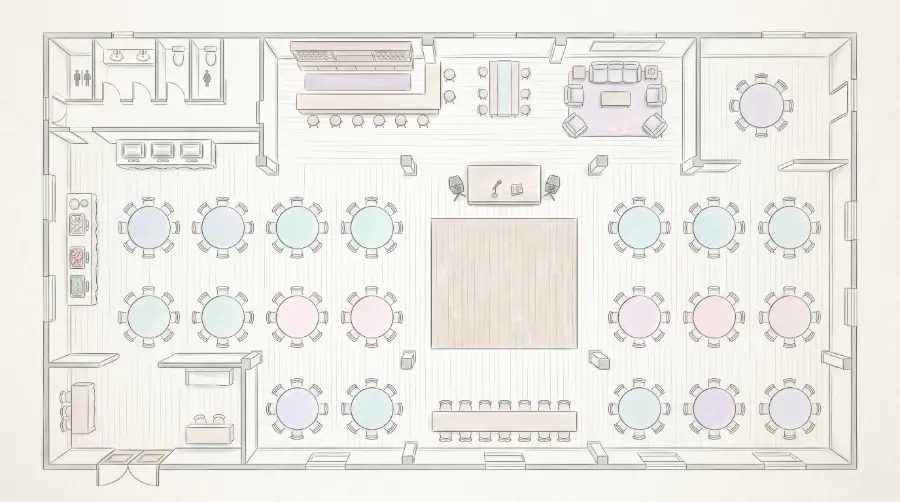
Once you have the floor plan, either print it large or load it into a digital tool (more on that below). Map out where each table will physically go before you start filling in names.
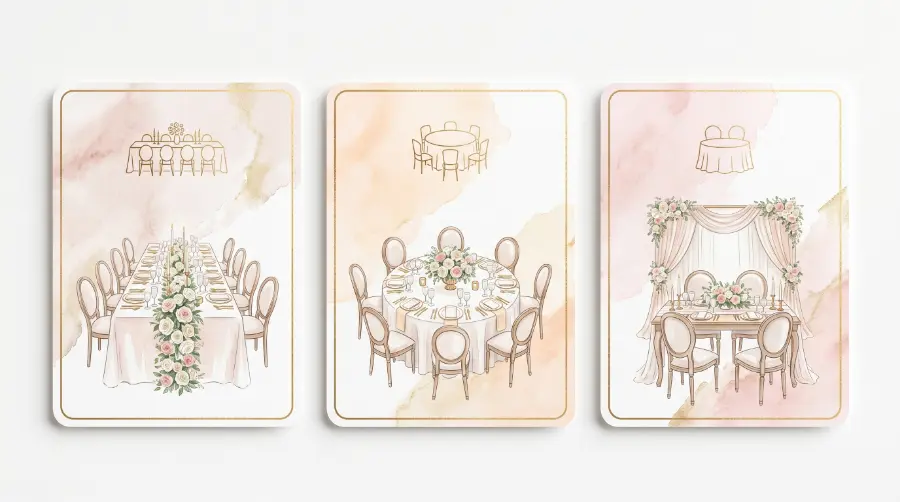
Choose the right table shape for your space
This is a practical decision, not just an aesthetic one. The shape of your tables affects how many people fit comfortably, how guests interact with each other, and how the room flows.
Round tables
Round tables are the most common choice for wedding receptions, and for good reason. They encourage conversation across the group. Everyone can see everyone else. There’s no “bad seat” at a round table.
Standard sizing:
- 5ft (60-inch) round: seats 8 comfortably, 10 at a squeeze
- 6ft (72-inch) round: seats 10 comfortably, 12 at a push
WATCH OUT
Seating 10 at a 5ft round table is technically possible, but guests will be elbow-to-elbow. If you’re tight on space, fewer people per table with better spacing is always a better experience.
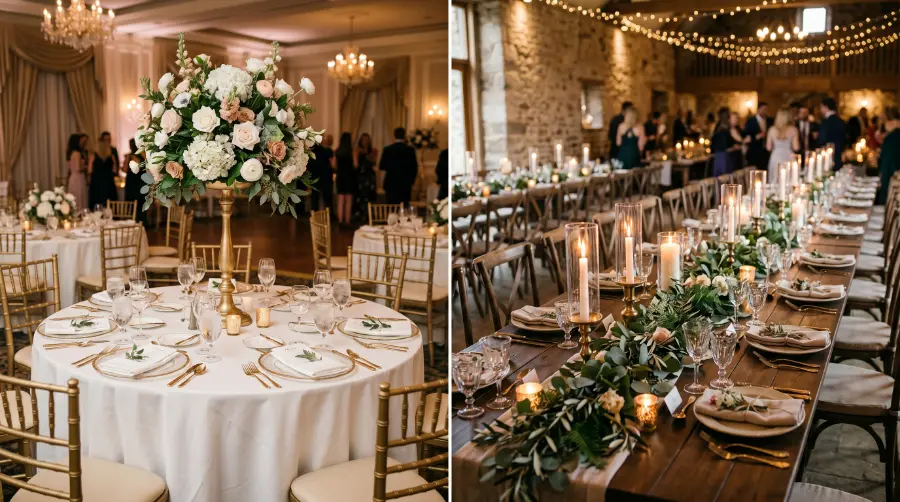
Long/banquet tables
Long rectangular tables create a dramatic, feasting-hall atmosphere. They’re popular at barn weddings, rustic venues, and more informal celebrations.
The trade-off: guests only really talk to the people immediately next to them or directly opposite. Someone at the far end of a 20-person table is essentially at a different party.
If you use long tables, keep them to 10–12 people maximum per table. Any longer and conversation dies at the ends.
Mixed formats
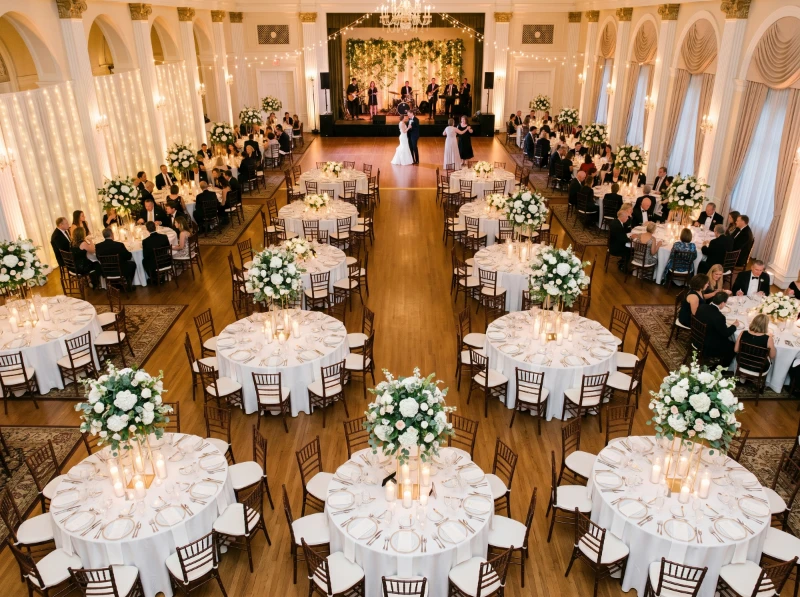
Some couples use a combination: a long head table for the wedding party and round tables for guests. This works well if the head table is set slightly elevated or on a stage so it’s visible from everywhere.
How much space does each guest actually need?
This is where most DIY seating plans fall apart. Couples count chairs per table but forget to account for the space between tables and the clearance for service.
Here are the numbers you need:
| Measurement | Minimum | Comfortable |
| Space per guest at table (linear) | 18 inches | 24 inches |
| Space between tables | 4 feet | 5–6 feet |
| Clearance for service aisles | 3 feet | 4–5 feet |
| Space behind chairs (when seated) | 18 inches | 24 inches |
A room that looks spacious on a floor plan can feel cramped once tables, chairs, centrepieces, and 120 guests in formal wear are in it. Always err on the side of fewer tables with more breathing room.
RULE OF THUMB
If your venue says it can seat 150 guests, plan for 120–130 maximum if you want people to feel comfortable rather than squeezed.
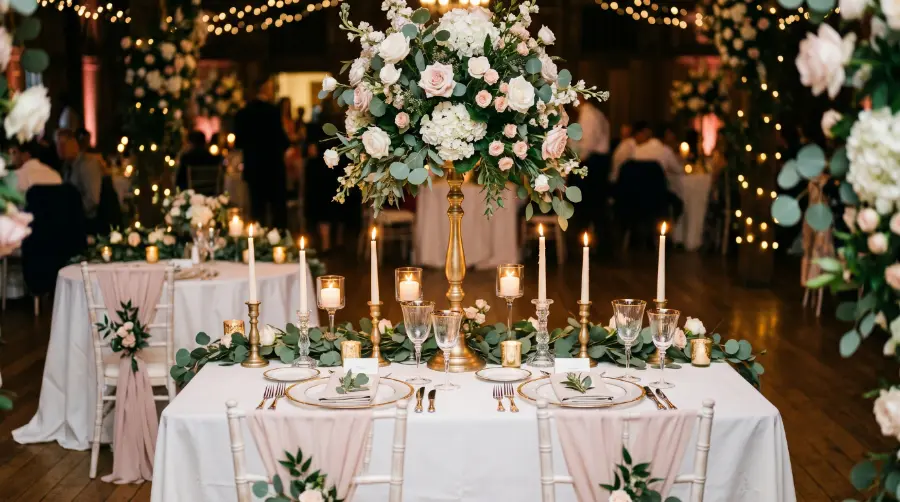
The top table debate: traditional vs. alternatives
The traditional top table seats the couple in the centre, flanked by their parents and the wedding party. It’s formal. It signals clearly who the focus of the day is. It photographs beautifully.
But it also creates some real-world problems.
If one of your parents is divorced, a top table can turn awkward fast. If your maid of honour’s partner isn’t seated with her, she’s stuck alone at a table of couples all night. And if you’re eating at the top table, you’re often sitting with people you’ve barely had time to see during the day, rather than actually enjoying your meal.
Alternatives worth considering
The sweetheart table
Just the two of you. Intimate, romantic, and lets you actually talk to each other during dinner. Your wedding party sits with their partners at regular guest tables. This is increasingly popular at modern weddings and it works.
The family table
A single large round or oval table that seats immediate family: parents, siblings, and the couple. Less formal than a top table, more communal.
No assigned top table
Some couples skip a top table entirely and seat themselves among their guests. This is uncommon but works well for smaller, informal weddings where the couple genuinely wants to mix.
How to group guests (without drama)
This is the heart of it. And it’s harder than it looks.
There are two schools of thought on grouping. Some planners group by relationship to the couple: all bride’s college friends together, all groom’s work colleagues together. Others mix it up deliberately, placing guests who’ve never met but have things in common at the same table.
Both approaches work. The key is intentionality.
Start with your anchor guests
Anchor guests are the ones with the least flexibility. Place these first:
- Elderly relatives: away from speakers, near exits if needed, with people they know
- Guests with young children: near an exit and away from the dance floor
- Guests with disabilities or mobility needs: accessible routes, no steps
- Guests who are recently bereaved: next to close friends or family who’ll look after them
- Any family members with known tension: maximum distance between them
Once your anchor guests are placed, the rest is much easier to solve.
Build tables around a social anchor
Every table works best when there’s at least one confident, sociable person anchoring it. They’ll get conversation going, look after quieter guests, and make sure everyone feels included.
If you’re mixing people who don’t know each other, give them something in common. Two guests who both love hiking will find each other. Two guests who just happen to both be vegetarians won’t necessarily connect. That’s not a social bond.
Handle the tricky situations honestly
Divorced parents at the same wedding are common. Seat them at separate tables with friends around them who’ll keep the conversation positive. Don’t seat them where they’ll have line-of-sight to each other all evening.
Ex-partners in the guest list? Give them tables on different sides of the room with people they’re comfortable with. Don’t overthink it, just create distance.
Solo guests attending without a plus-one deserve special care. Don’t seat them alone or with couples who’ll spend the night talking to each other. Put them at a table with other sociable guests and ideally next to someone you know will make conversation.
PRO TIP
Leave a handwritten note at each place setting introducing the table. Something like: “This is Table 5, the adventure-seekers. Ask Sarah about her recent trip to Patagonia.” It sounds small. It starts conversations in the first five minutes.

Dietary needs and accessibility: don’t leave these to last
Dietary requirements should be collected on your RSVP cards and built into your seating plan from the start, not bolted on at the end.
Your caterer needs to know exactly who at each table has:
- Severe allergies (nut, gluten, shellfish)
- Dietary preferences (vegan, vegetarian, halal, kosher)
- Medical dietary restrictions (diabetic, low-sodium)
When you share your final seating plan with the venue, flag these clearly. Some caterers use coloured place cards or discreet symbols on seating charts to help service staff identify the right meals quickly. Ask yours what system they use and align with it.
Accessibility isn’t an afterthought
If you have guests who use wheelchairs, walking frames, or have limited mobility:
- Ensure their table has clear access from the entrance, no dodging round chairs
- Leave extra clearance around their chair position (at least 36 inches)
- Seat them where they have a good view of the speeches and first dance without needing to move
- Make sure accessible toilet routes are clear from their table
Call the guest directly if you’re unsure what they need. They’ll appreciate being asked.
The best tools to build your seating plan
Pen and paper works. But digital tools save hours and let you drag guests around when someone cancels the week before.
Free options
Hitched Table Planner (hitched.co.uk): clean, simple drag-and-drop. Good for UK-based couples with straightforward layouts.
WeddingWire Seating Chart: similar functionality, slightly more features, works well for larger guest lists.
Google Sheets: not visual, but extremely flexible. Many professional planners use a simple spreadsheet with colour-coded rows. Fast to update, easy to share with your caterer.
Paid options
AllSeated: the most powerful tool in this space. You can import the actual dimensions of your venue, build a 3D walkthrough, and see exactly how the room will look. Overkill for most couples, but if you have a complex venue or a large guest list (200+), it’s worth it.
Seating Arrangement (seatingarrangement.com): straightforward and affordable. Good for couples who want something between free and full-featured.
PRO TIP
Whatever tool you use, export a final PDF version to send to your venue coordinator and caterer. Don’t rely on sharing a login. A printed or PDF seating chart on the day of the wedding is worth its weight in gold.
Common seating mistakes and how to avoid them
These come up again and again at weddings. All of them are preventable.
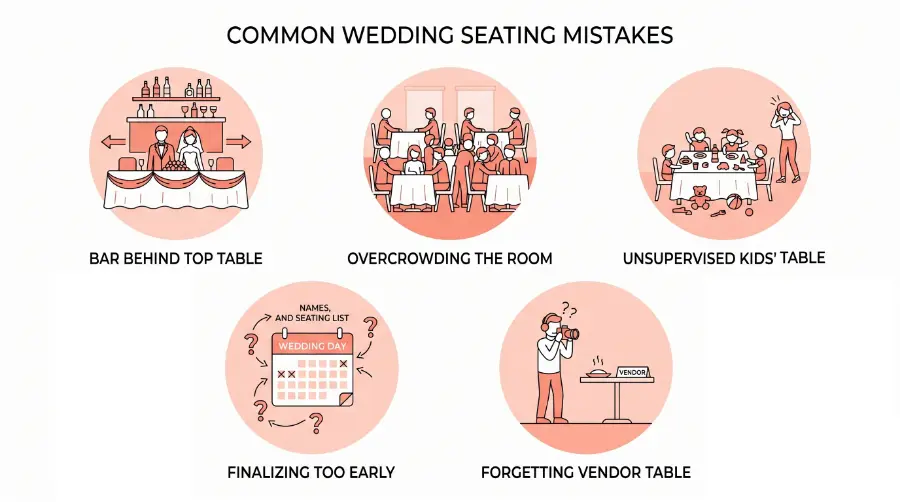
Mistake 1: Putting the bar behind the top table
Guests will be walking behind you all night. Place the bar in a position that creates traffic flow away from the head of the room, not through it.
Mistake 2: Filling every inch of the room
A full room looks great in photos before guests arrive. With people in it, chairs pulled out, bags on the floor, and service trolleys moving through, it becomes a squeeze. Build in more space than you think you need.
Mistake 3: Treating the kids’ table as a dumping ground
Clustering all children together without supervising adults nearby creates chaos. Seat children at tables with at least one parent or trusted adult who isn’t deeply involved in the main bridal party responsibilities.
Mistake 4: Finalising too early
Guest lists shift. People cancel. Plus-ones materialise two weeks before the date. Build your seating plan in a format that’s easy to update, and don’t print your display chart until two weeks out at the very earliest.
Mistake 5: Forgetting the vendor table
Your photographer, videographer, and band/DJ will need to eat. Decide early whether you’re feeding vendors and if so, where. A small table near the kitchen works well. They need to eat quickly and get back to work.
When to finalise your table layout
Here’s a practical timeline:
- 6 months out: Get the venue floor plan. Decide on table shapes and rough layout.
- 8 weeks out: Chase any outstanding RSVPs. Begin a working draft of the seating plan.
- 4 weeks out: Seating plan should be mostly locked. Share a draft with your venue.
- 2 weeks out: Final changes only. Print your display seating chart. Send the final version to your caterer.
- 1 week out: Confirm with your venue. Make last-minute adjustments if needed.
- The day before: No more changes. Trust the plan.
Late cancellations will happen. Have a protocol ready: usually a small buffer table or flexible round that can absorb a couple of last-minute changes without disrupting the whole plan.
Frequently asked questions
Should I assign specific seats or just assign tables?
For most weddings, assigning tables (not specific seats) is enough. It gives guests a little freedom while still giving you control over who sits near whom. Specific seat assignments work well for very formal dinners or if you have tricky interpersonal dynamics to manage at particular tables.
How do I handle a guest who RSVP’d yes but then cancels last minute?
If the cancellation happens after your chart is printed, leave the chair in place. An extra seat looks far better than a visibly adjusted layout. If it’s before printing, update the chart and adjust the table count if needed.
What’s the right number of guests per table?
Eight to ten per round table is the sweet spot for conversation and comfort. Fewer than six and the table can feel sparse. More than twelve and it fragments into two separate conversations anyway.
Do I need a seating chart display at the venue entrance?
Yes, or at minimum, individual place cards. Guests should never have to wander around looking for their name. A clear display board or escort cards at the entrance eliminates confusion and lets people find their seats quickly so the room settles faster.
Can I use table names instead of numbers?
Absolutely, and many couples prefer them. Themed names like cities you’ve visited together, favourite books, or wine regions add personality. Just make sure the display chart is organised alphabetically by guest name, not by table name, or finding seats becomes a puzzle.
The bottom line
Your table layout is one of the most practical, highest-impact decisions you’ll make for your wedding reception. It doesn’t need to be perfect. It needs to be thoughtful.
Prioritise your guests who need the most care. Build around your venue’s real constraints. Leave more space than you think you need. And lock the plan down early enough to print calmly, not the night before.
Get that right, and the room will take care of itself.