29 DIY Floral Centerpieces You Can Create at Home Easily
Making your own floral centerpieces at home is one of the most rewarding things you can do for a party, a dinner, or simply your own living space.
There is something genuinely satisfying about gathering flowers, choosing a vessel, and creating something beautiful with your own hands.
The best part is that DIY florals do not require professional training, expensive tools, or a florist’s budget. They require curiosity, a little patience, and the willingness to trust your own eye for what looks beautiful.
These 29 ideas are designed to be genuinely achievable at home, using flowers from the supermarket, the garden, a farmers market, or even a roadside bunch picked on a walk.
Some ideas are simple enough to complete in five minutes. Others are a little more involved but entirely within reach for anyone who loves making things.
Whether you are decorating for a party, a dinner, a celebration, or just because your table deserves something lovely, these ideas will give you everything you need to start creating.
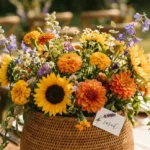
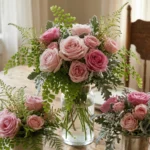
1. Single Stem Bud Vase Clusters
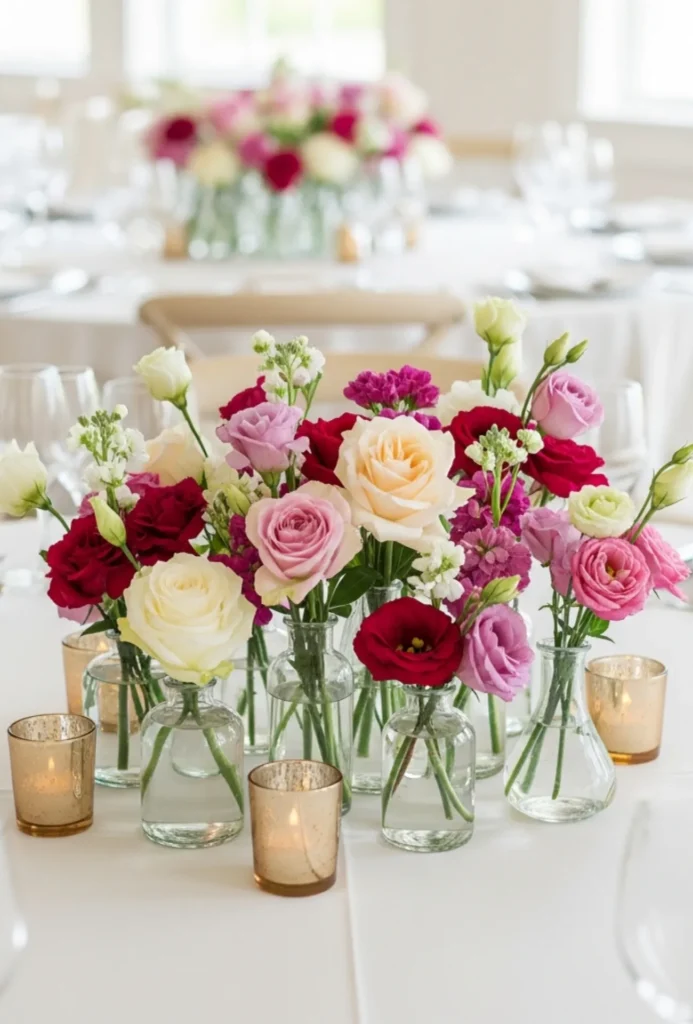
A cluster of small bud vases each holding just one or two stems is one of the most accessible and enduringly beautiful DIY centerpiece approaches.
It requires no arranging skill, no floral foam, and no formal training. You simply place a stem in a vessel and let the flower do what it does naturally.
The magic is in the grouping. Individual stems in isolation can look sparse and unfinished but gathered together into a close cluster they create something that reads as one generous, considered centerpiece.
Push the vessels close enough together that the arrangements feel like one cohesive display rather than separate objects.
Collect vessels gradually over time from thrift stores, flea markets, and around the home. Old medicine bottles, small ceramic pots, tiny glass vases, and short jam jars all work beautifully. The more varied the vessels, the more interesting the cluster becomes.
- Use an odd number of vessels for the most naturally balanced visual grouping
- Vary vessel heights so shorter flowers sit beside taller vessels for rhythm and flow
- Repeat one signature bloom or color across all vessels to unify the cluster visually
- Scatter a few loose petals between the vessels to connect them as one complete display
2. Citrus & Floral Glass Vase Arrangements
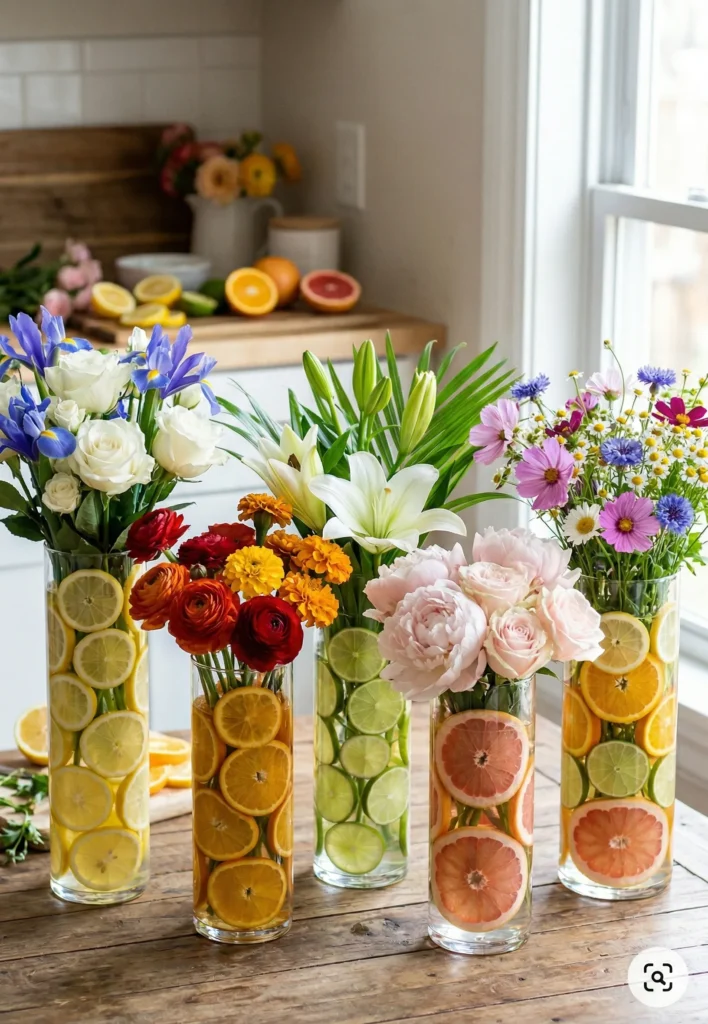
Layering sliced citrus inside a clear glass vase before adding flowers is a technique that costs almost nothing extra and produces results that look genuinely beautiful and professionally styled.
The colors of the fruit visible through the glass do half the decorative work before a single flower is placed.
Slice lemons, oranges, limes, or grapefruit into rounds and press them against the inner wall of a tall glass cylinder vase.
Fill with water and arrange flower stems in the center. The citrus holds the stems in loose position, scents the water naturally, and creates a display that is as beautiful from the side as from above.
This is one of those DIY techniques that looks far more involved than it actually is. The total additional effort is about three minutes of slicing and pressing fruit against glass.
| Citrus Choice | Color Through Glass | Best Flower Pairing |
| Lemon slices | Bright yellow, vivid | White roses, blue irises |
| Orange rounds | Warm amber, glowing | Deep red blooms, marigolds |
| Lime wheels | Cool green, fresh | White flowers, tropical stems |
| Grapefruit rounds | Soft pink blush | Blush peonies, pale roses |
| Mixed citrus | Layered, colorful | Wildflower mixes, any stems |
3. Potted Herb & Flower Combinations
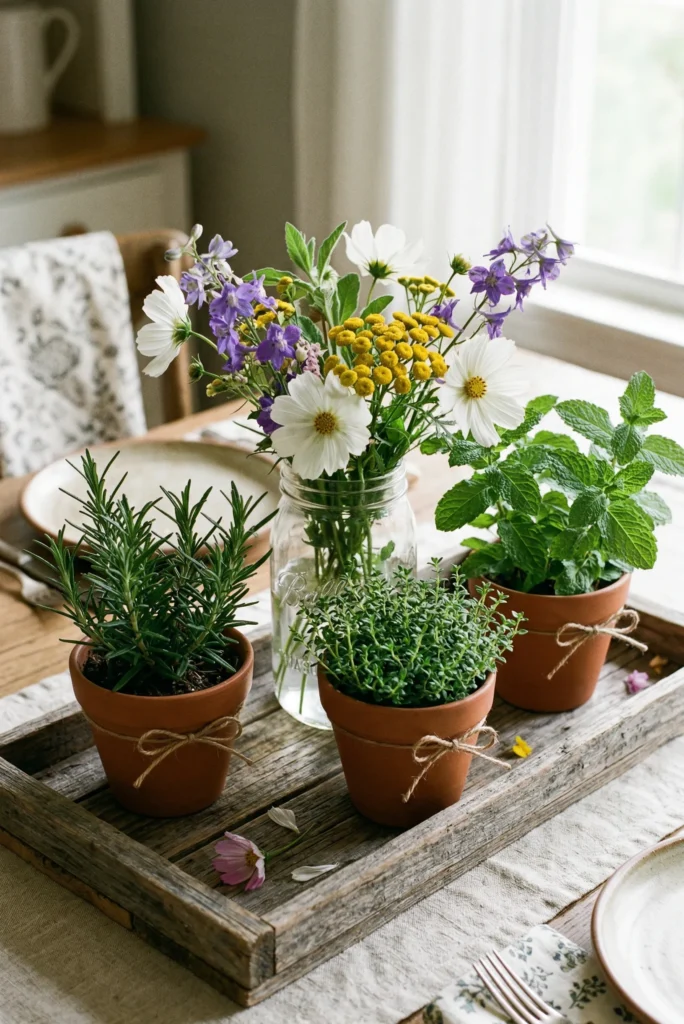
Grouping small potted herbs alongside a simple floral arrangement creates a centerpiece that is both visually beautiful and wonderfully fragrant.
The combination of different green textures alongside blooms has a natural, kitchen-garden charm that feels warm and genuinely inviting.
Place a small bunch of flowers in a simple vase or jar and arrange two or three potted herbs beside it on a small tray or wooden board.
Rosemary, thyme, mint, lavender, and basil all have beautiful foliage and distinctive fragrances that drift gently across the table during a meal. The herbs frame and complement the flowers without competing with them.
This centerpiece style suits kitchen tables, casual dinner parties, and any gathering where a natural, unforced aesthetic is the goal. It also doubles as a practical herb display between events.
- Choose herbs with interesting leaf shapes and textures for the most visually varied display
- Tie a small ribbon or simple twine around each terracotta pot for a finished look
- Place everything on a wooden tray or slate tile to define the centerpiece as one cohesive display
- Guests often love being invited to pinch a herb leaf and take in the scent
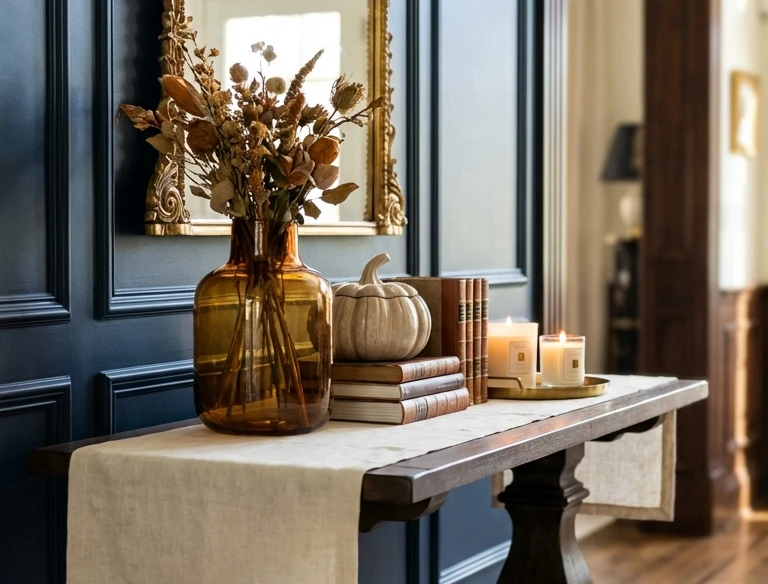
4. Dried Pampas & Fresh Bloom Mixes
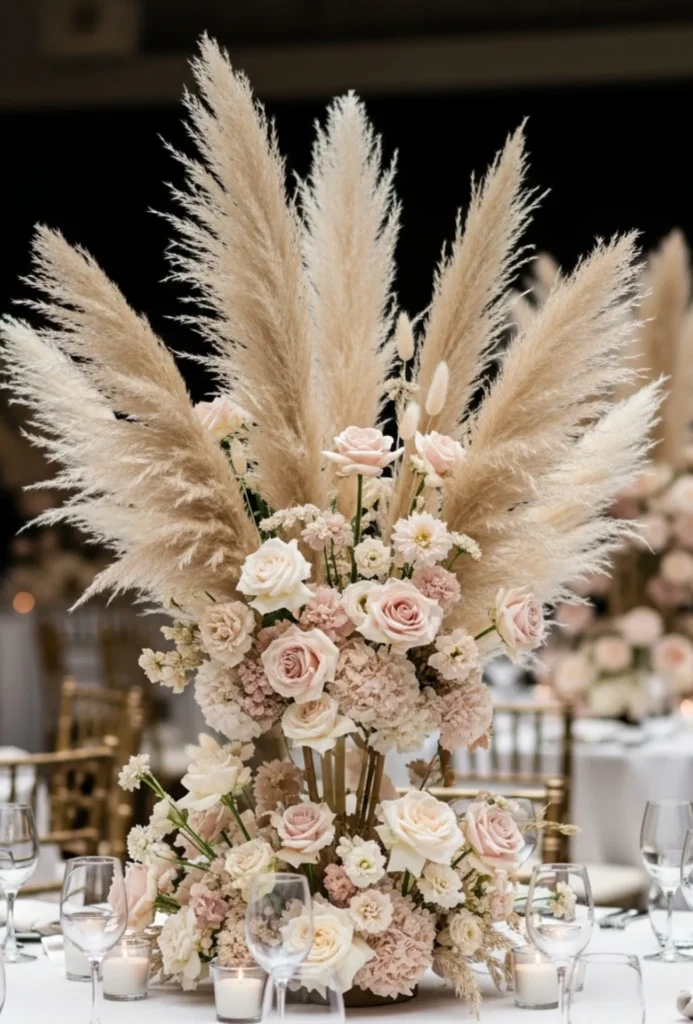
Combining dried pampas grass with fresh blooms creates a centerpiece that bridges the natural and the cultivated in the most beautiful way.
The feathery, architectural quality of pampas alongside soft, living flowers has a tension and visual richness that purely fresh or purely dried arrangements rarely achieve.
Establish the pampas stems first as the tallest elements of the arrangement, letting their plumes fan outward above everything else.
Fill in the middle and lower sections with fresh blooms in warm neutrals, dusty pinks, blush tones, or terracotta shades. The warm palette of most pampas grass works most harmoniously with these warmer flower colors.
The practical advantage of mixing dried and fresh is longevity. The pampas will outlast the fresh flowers by weeks or months, meaning the arrangement simply evolves rather than ending abruptly when the blooms fade.
- Shake pampas gently before arranging to release any loose seeds and fluff the plumes naturally
- Choose a vessel with enough weight to support tall pampas stems without tipping
- Spray dried pampas lightly with hairspray to reduce shedding during and after the event
- Blush, peach, and dried rust-toned pampas varieties create a particularly beautiful combination
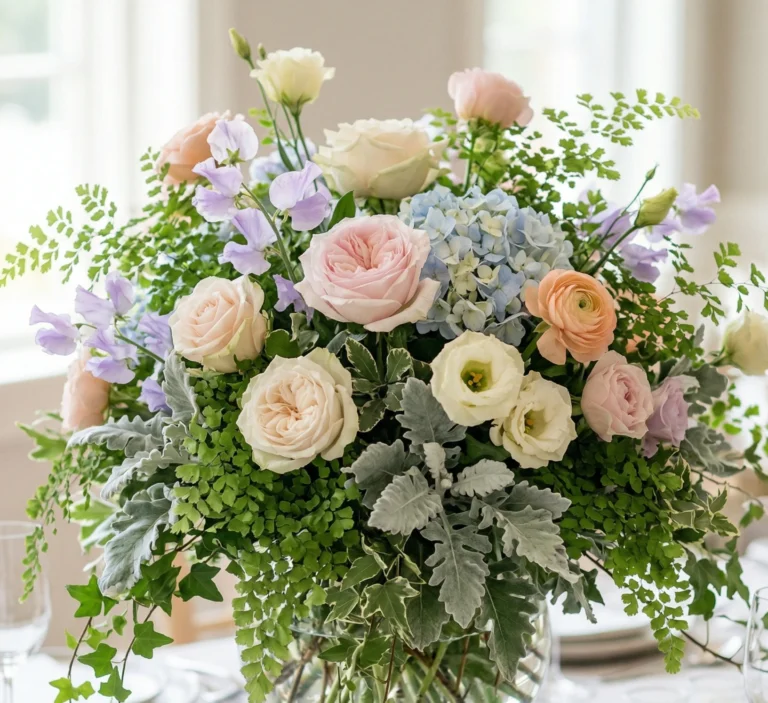
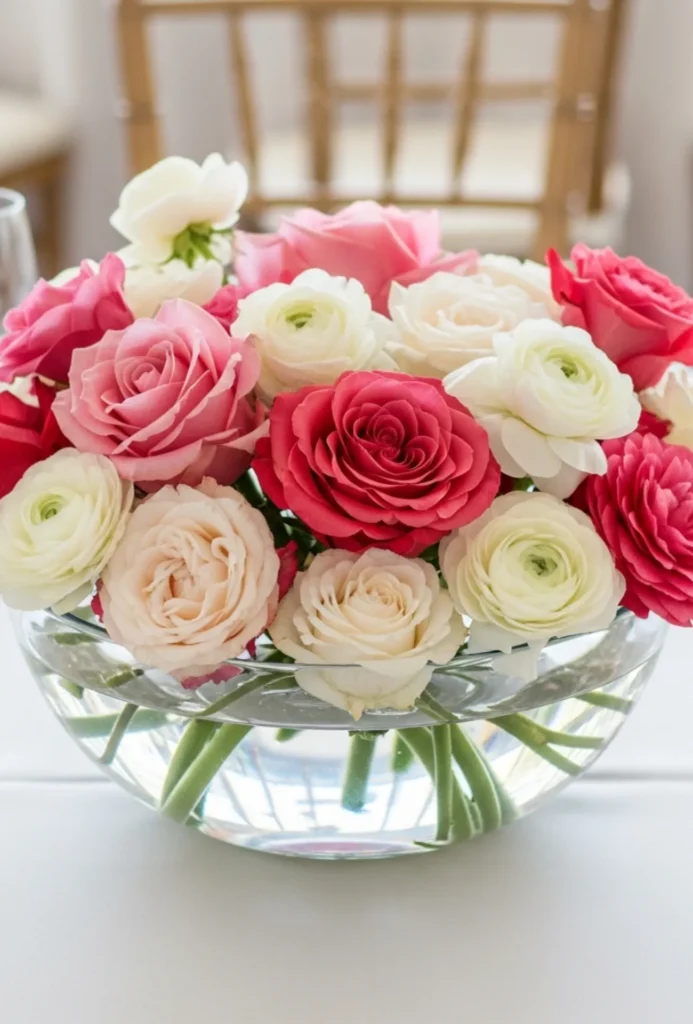
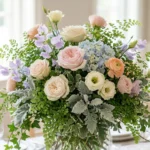
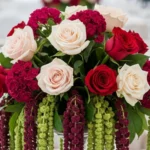
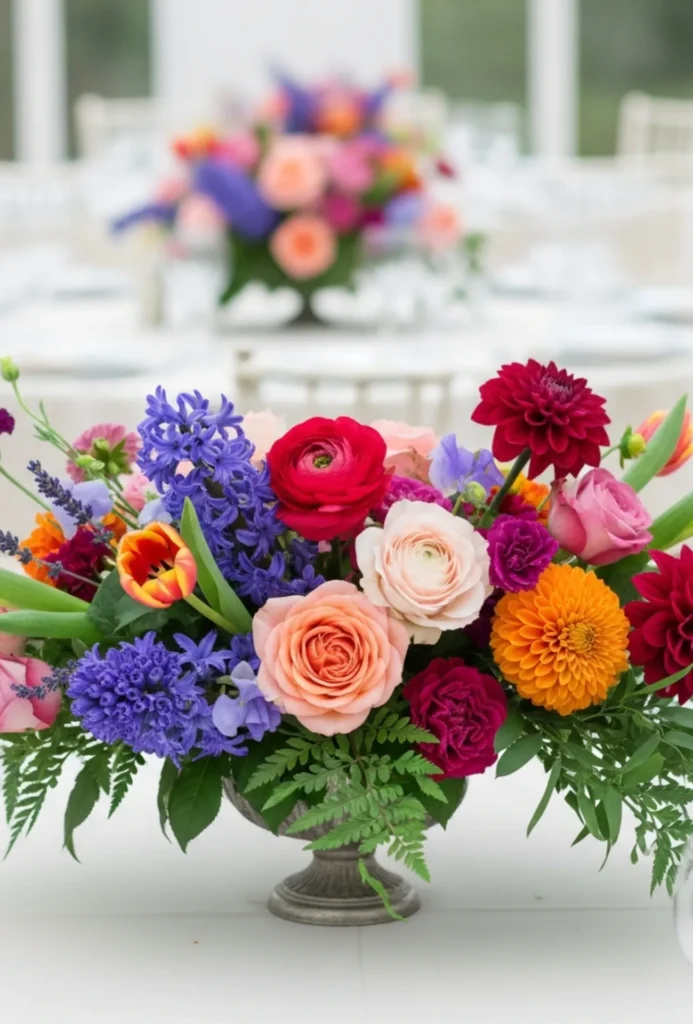
5. Monochrome Flower Color Arrangements
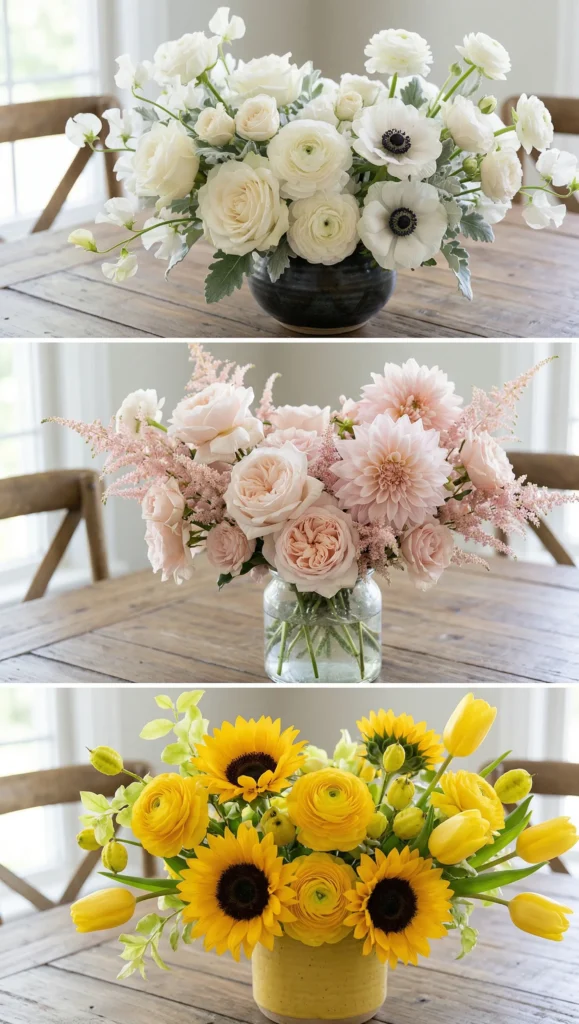

Choosing a single color and exploring every tone, shade, and texture within it creates a floral arrangement with a quiet confidence and sophistication that multicolored arrangements sometimes lack.
Monochrome florals look considered, deliberate, and genuinely beautiful.
An all-white arrangement using roses, ranunculus, sweet peas, and white anemones has extraordinary depth despite using no color variation.
An all-blush arrangement mixing pale roses, soft dahlias, and dusty pink astilbe feels abundantly romantic. An all-yellow arrangement using sunflowers, ranunculus, and tulips is pure sunshine.
The secret to making monochrome arrangements work at home is using at least four or five different flower varieties within the chosen color. When color variation is removed, texture and form carry all the visual interest and variety within the arrangement.
- Include flowers at different stages of bloom opening for natural tonal variation within the color
- Add greenery or seed pods in tones close to your chosen color to maintain the monochrome effect
- Vary bloom sizes dramatically from large focal flowers down to tiny filler pieces
- A monochrome arrangement in a contrasting vessel creates beautiful visual tension
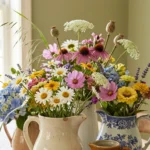
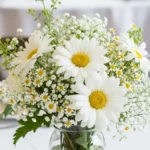
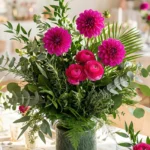
6. Wildflower Loose Garden-Style Centerpieces
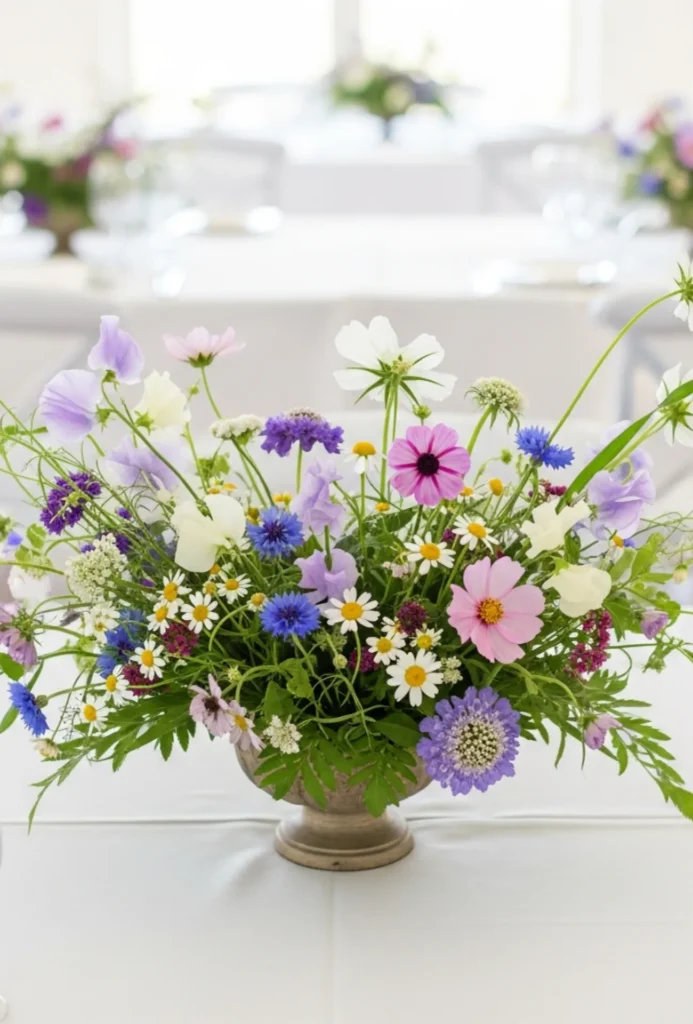
A loose wildflower centerpiece looks as though someone walked through a summer field with scissors and gathered whatever was most beautiful into a casual bunch.
The effortless quality is the entire point, and achieving it well is genuinely satisfying.
Mix fine, delicate flowers like sweet peas, cornflowers, and cosmos with small daisies, scabiosa, and grasses.
Include stems at dramatically different heights and let some pieces reach outward well beyond the vessel edge. Place in a relaxed vessel like a ceramic jug, an old glass bottle, or a simple tin and the whole arrangement looks naturally perfect.
The more genuinely seasonal and locally sourced the flowers, the more convincing and beautiful the wildflower aesthetic becomes. Farmers markets and garden centers are far better sources for this style than supermarket bouquets.
- Avoid cutting all stems to the same length as uniform heights undermine the wildflower quality
- Include stems with interesting seed heads, unopened buds, and small leaves alongside open blooms
- Flowering herbs like chamomile, mint blossom, and lavender add fragrance and authenticity
- An arrangement that looks slightly imperfect is more convincing than one that looks too controlled
7. Floating Flowers in Clear Bowls
Placing flower heads on the surface of water in a clear bowl is one of the simplest and most visually beautiful DIY centerpiece techniques available.
The reflection of the blooms in the water, the way petals catch the light, and the gentle floating movement create something meditative and genuinely lovely.
Fill a wide, shallow ceramic or glass bowl with clean water and float full bloom heads on the surface. Roses, gardenias, ranunculus, and camellias all float with natural grace.
For an evening centerpiece, add small floating tea light candles between the flower heads. The combination of candlelight and floating blooms is extraordinarily beautiful.
The entire setup takes under five minutes and requires no arranging skill. The water does the work of displaying each bloom perfectly at the same level.
- Choose flowers with flat, open faces rather than tight buds for the best floating effect
- Tint the water very lightly with food coloring for a beautiful and subtle color enhancement
- Scatter a few loose petals on the water surface between the fuller bloom heads
- Use distilled or filtered water for the clearest, most beautiful result
8. Mason Jar Layered Floral Displays
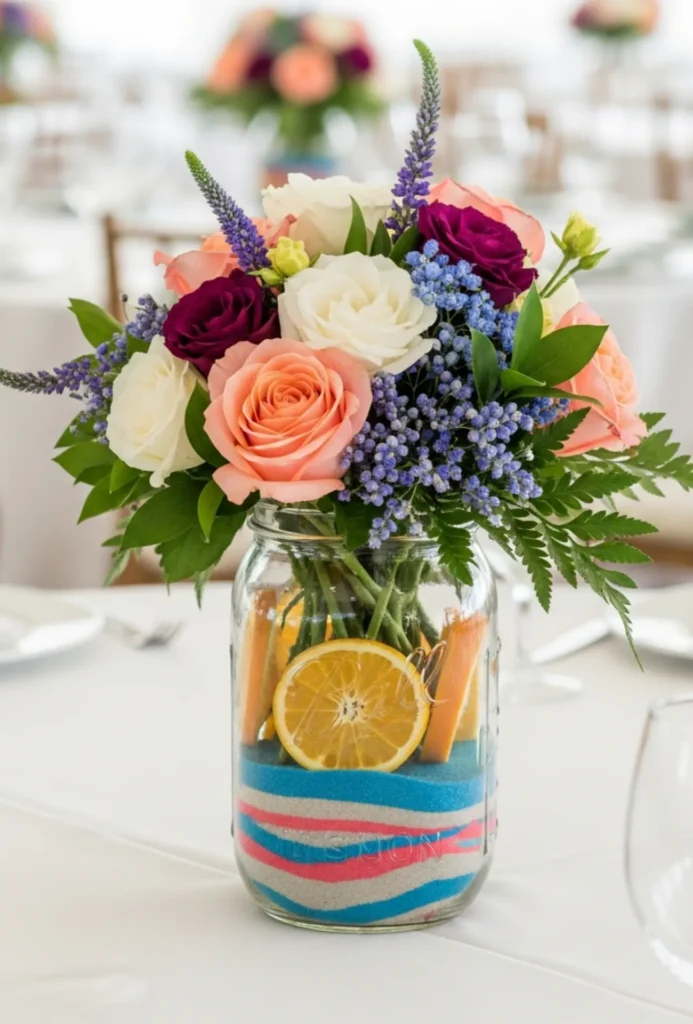
Mason jars are among the most versatile and widely available DIY floral vessels available. Their transparent sides allow for internal layering and decoration that transforms a simple jar into something genuinely styled and beautiful.
Before adding water and flowers, layer colored sand, small pebbles, or a handful of vibrant citrus slices along the inside of the jar.
Add water on top of the layered base and arrange a loose bunch of flowers in the opening. The layered jar base adds color and visual interest below the waterline while the flowers create the arrangement above.
Group three or five mason jars of different sizes together as a cluster and the combined effect is warm, handmade, and charming in the best possible way.
| Mason Jar Base Layer | Visual Effect | Flower Style to Use |
| Colored sand layers | Graphic, colorful, playful | Simple wildflowers, cosmos |
| River pebbles | Natural, earthy, calm | Greenery, herbs, loose stems |
| Citrus slices | Fresh, vivid, fragrant | White roses, mixed blooms |
| Glass beads | Sparkly, modern, festive | Garden roses, ranunculus |
| Dried flower petals | Romantic, soft, vintage | Sweet peas, small dahlias |
9. Mini Floral Arrangements Grouped Together
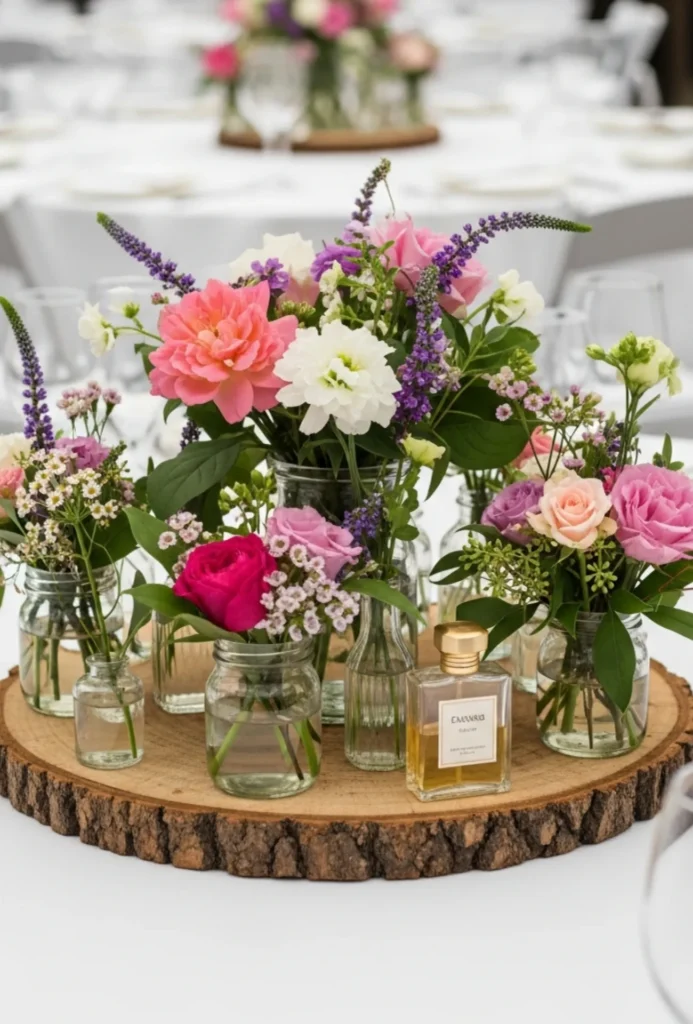
Rather than one large centerpiece, a collection of small individual arrangements grouped loosely together creates something that feels relaxed, abundant, and genuinely inviting.
Each mini arrangement can be slightly different while the group reads as one cohesive display.
Use any small vessels you have at home: short jam jars, small ceramic pots, tiny glass bottles, old perfume bottles, or cut-down tin cans.
Place just two or three stems in each and push all the vessels close together in the center of the table. Add a few loose flower heads or petals between vessels to connect the grouping visually.
The genius of grouped mini arrangements is that they are endlessly flexible. The group can expand for larger tables, contract for smaller ones, and individual vessels can be replaced if one arrangement wilts ahead of the others.
- Mix vessel materials such as glass, ceramic, and metal for the most interesting grouping
- Let some arrangements be just greenery stems for a fresh, varied quality across the group
- Use one consistent flower type across all vessels to unify the diverse collection of vessels
- An odd number of vessels always creates a more naturally balanced visual grouping
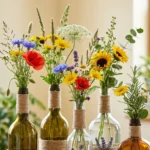
10. Vintage Bottle Floral Stems
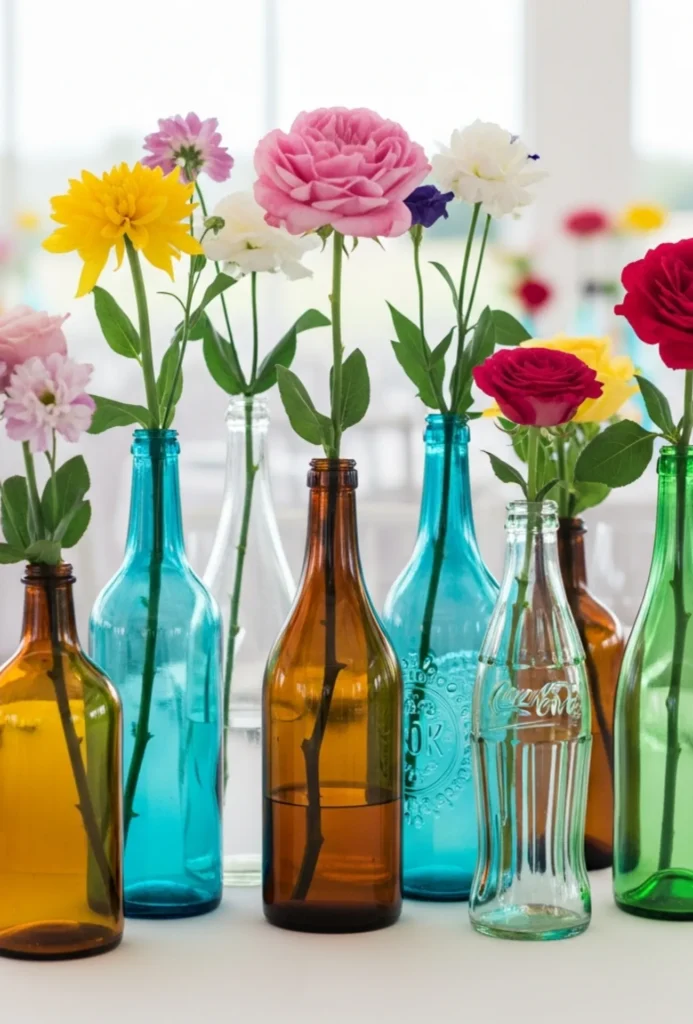

Old glass bottles with interesting shapes and colors are among the most beautiful and freely available DIY floral vessels.
Once cleaned and filled with a simple stem or two, they become genuinely striking display pieces that look collected and curated rather than simply found.
Amber medicine bottles, old blue glass bottles, clear vintage soda bottles, and pale green wine bottles all have their own character and visual quality.
Group several together in varying heights and fill each with one to three stems. The bottles do most of the decorative work and the flowers simply complete the picture.
Source vintage bottles gradually from thrift stores, antique markets, recycling centers, and your own kitchen recycling. The collection grows naturally over time and becomes more interesting the more varied it becomes.
- Clean bottles thoroughly and remove all labels before using as floral vessels
- Group bottles in complementary rather than identical colors for the most interesting cluster
- Use a single long-stemmed flower in a tall bottle for the most elegant minimal effect
- Taller vintage bottles suit large architectural stems like alliums, sunflowers, and branches
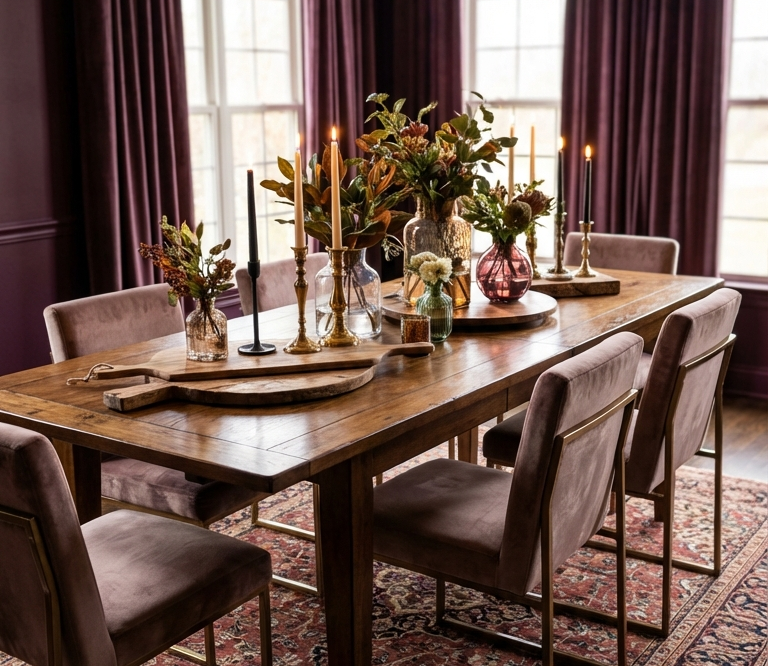
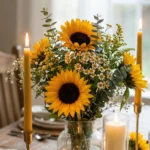
11. Floral & Candle Simple Table Clusters
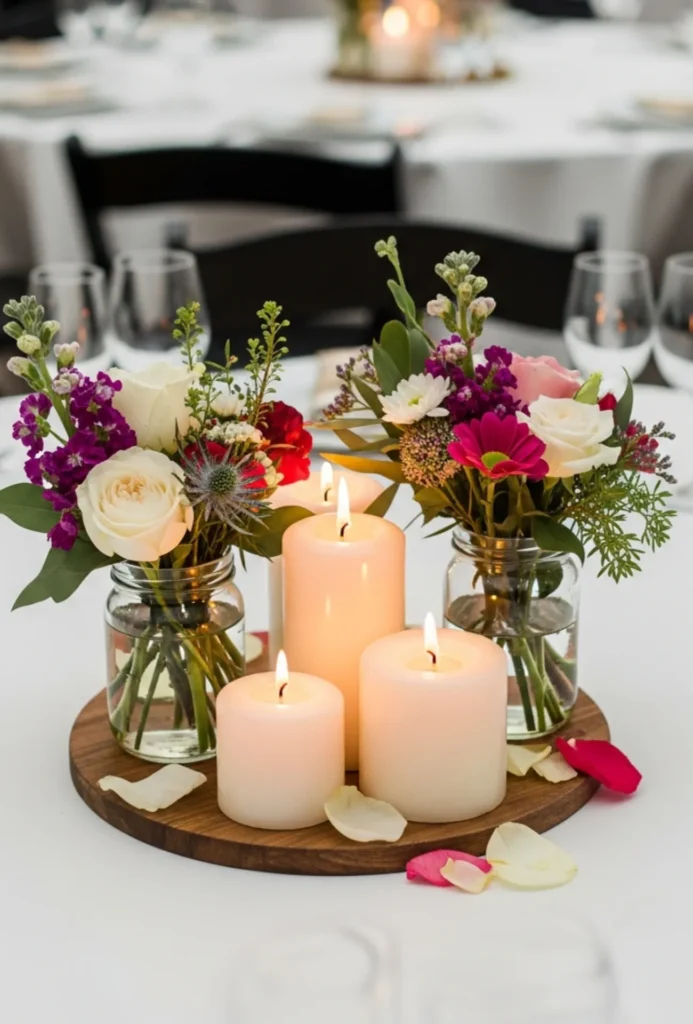
Combining a small floral arrangement with candles in a simple table cluster is the most accessible and reliably beautiful DIY centerpiece approach available. Flowers and candlelight are natural partners and even the simplest versions of this combination look genuinely warm and lovely.
Group a small jar or vase of flowers with two or three candles of different heights on a small tray or wooden board.
The tray unifies the elements as one centerpiece rather than separate objects. Scatter a few loose petals or small stones around the candle bases for a finished, considered look.
This centerpiece works for dinner parties, birthday tables, relaxed gatherings, and simply for making an ordinary weeknight dinner feel like a special occasion. It takes five minutes to assemble and the effect is completely disproportionate to the effort.
- Always keep flower stems and loose petals well clear of open candle flames
- Use pillar candles, tapers, or votives depending on the formality of the occasion
- A mirrored tile under the tray reflects both the flowers and the candlelight beautifully
- Battery-operated candles work well for outdoor settings or events with children present
12. Terracotta Pot Floral Centerpieces
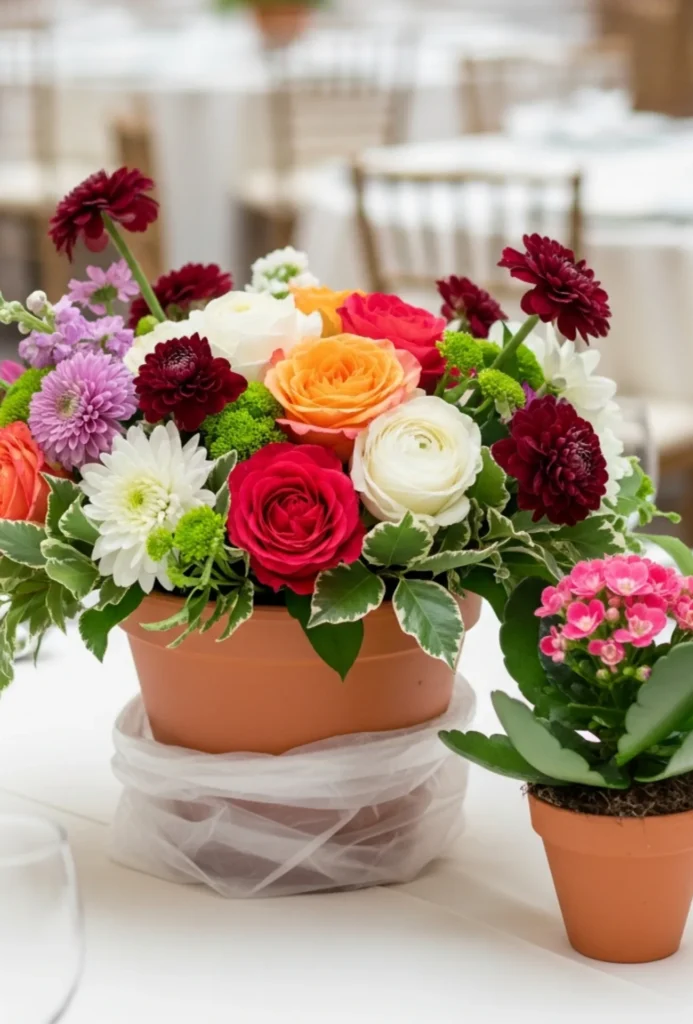
A terracotta pot is one of the warmest, most naturally beautiful vessels available for DIY florals. Its earthy, slightly rough texture and warm burnt orange tone complement flowers in a way that smooth, neutral vessels sometimes do not.
Line a terracotta pot with a plastic bag or small container to make it waterproof and fill with a generous bunch of seasonal blooms.
Alternatively, plant a small flowering plant directly into the pot using fresh potting mix. Either approach produces a centerpiece that looks honest, warm, and beautifully grounded.
Group three terracotta pots of different sizes together on a wooden board or a piece of slate for a cohesive, earthy centerpiece display that suits kitchen tables, garden parties, and any casual celebration.
- Age new terracotta pots naturally by brushing with yogurt or buttermilk and leaving outdoors
- Terracotta tones complement warm flower colors like orange, coral, peach, and rust beautifully
- Paint terracotta pots with a light chalk wash for a softer, more Scandinavian aesthetic
- Add a layer of moss around the base of planted flowers for a polished, finished appearance
13. Floral Arrangements with Moss Bases
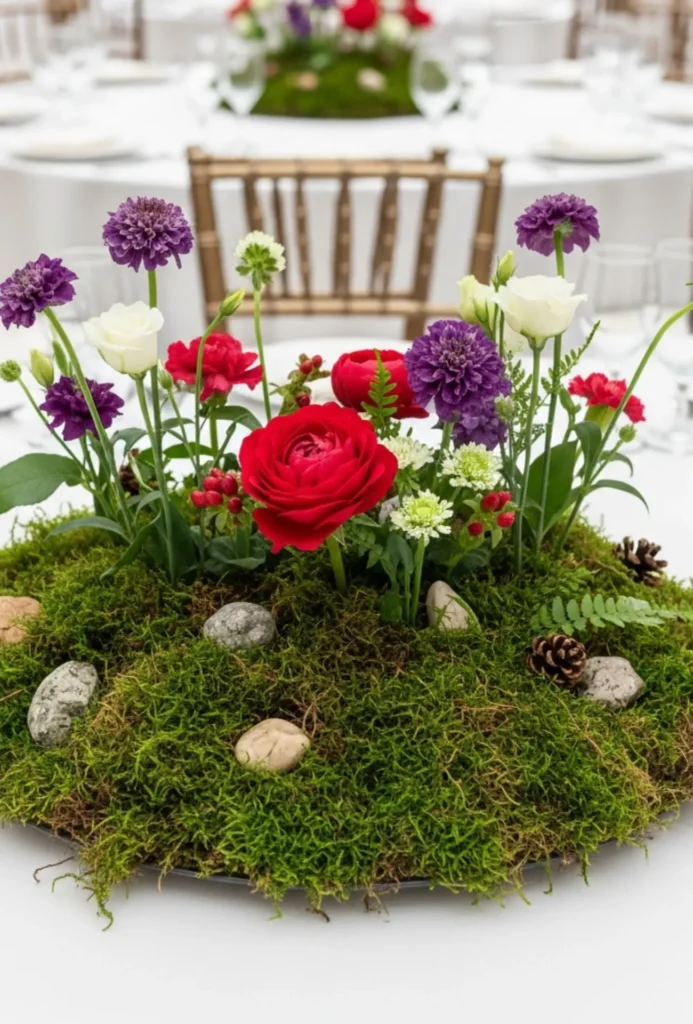
Incorporating fresh or preserved moss into a floral arrangement creates a living, forest-floor quality that no other material replicates.
Moss brings deep green texture, an earthy freshness, and a grounded, natural quality that makes flowers look as though they are genuinely growing from the earth.
Line the base of a wide vessel with sheet moss or cushion moss and nestle flower stems directly into it. Add small rocks, pinecones, or tiny ferns throughout the moss layer to deepen the woodland quality.
The flowers appear to emerge from the ground naturally rather than from a conventional vase arrangement.
Moss arrangements are also wonderfully practical. The moss retains moisture and keeps the surrounding stems fresher for longer, especially in warm environments.
- Mist moss lightly with water before and during the event to keep it looking vivid and fresh
- Use preserved sheet moss for a low-maintenance option that requires no watering
- Combine several moss-based arrangements along a table runner for a living forest table
- Tuck tea light candles into moss pockets around the base of the floral stems for warmth
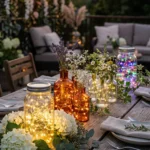
14. Hanging Mini Floral Jar Setups
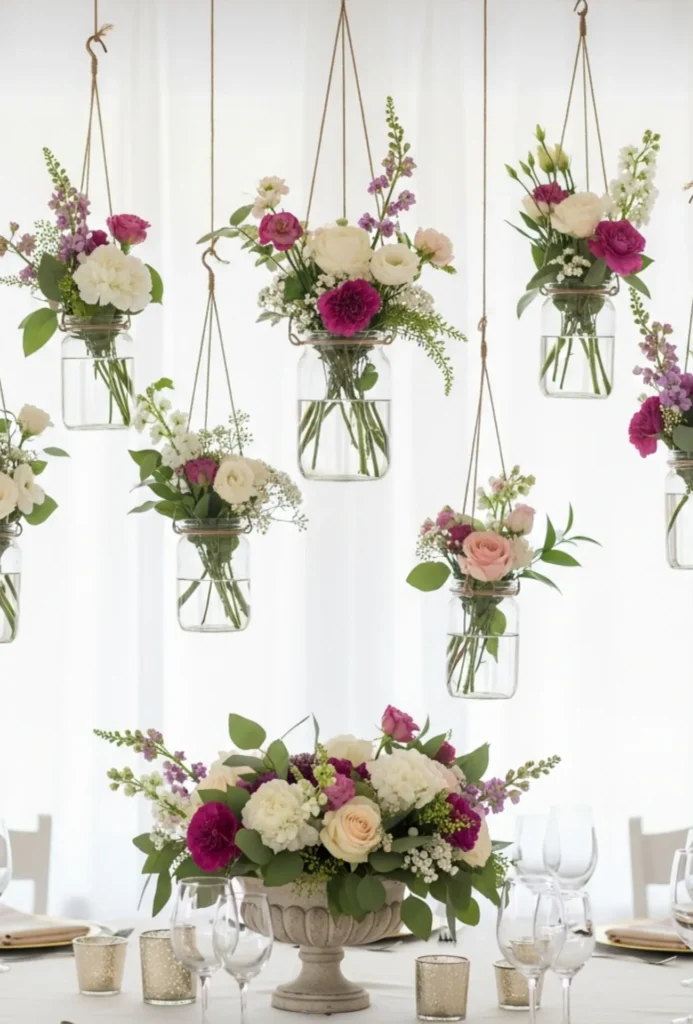
Suspending small floral jars above the table rather than placing them on it creates a completely different kind of centerpiece magic.
Hanging arrangements use vertical space, create movement, and produce a beautiful overhead display that transforms the table atmosphere entirely.
Thread thin wire or twine through the lid of a small jar and hang from a suspended rod, branch, or frame positioned above the table.
Fill each jar with a small amount of water and two or three flower stems. The flowers hang at eye level when seated, creating an enveloping, garden-like quality.
Use several jars of different heights hung from the same suspended branch or rod for maximum impact. The arrangement shifts gently in air movement and the soft swaying quality adds to the beauty.
- Ensure any suspended element is secured safely and at a practical height above the table
- Use battery-operated mini lights around the hanging frame for an evening version
- Hang jars at three different lengths from the same rod for movement and visual depth
- Wrap the suspension branch or rod in trailing greenery for a more finished, lush look
15. Floral Hoop Centerpiece Designs
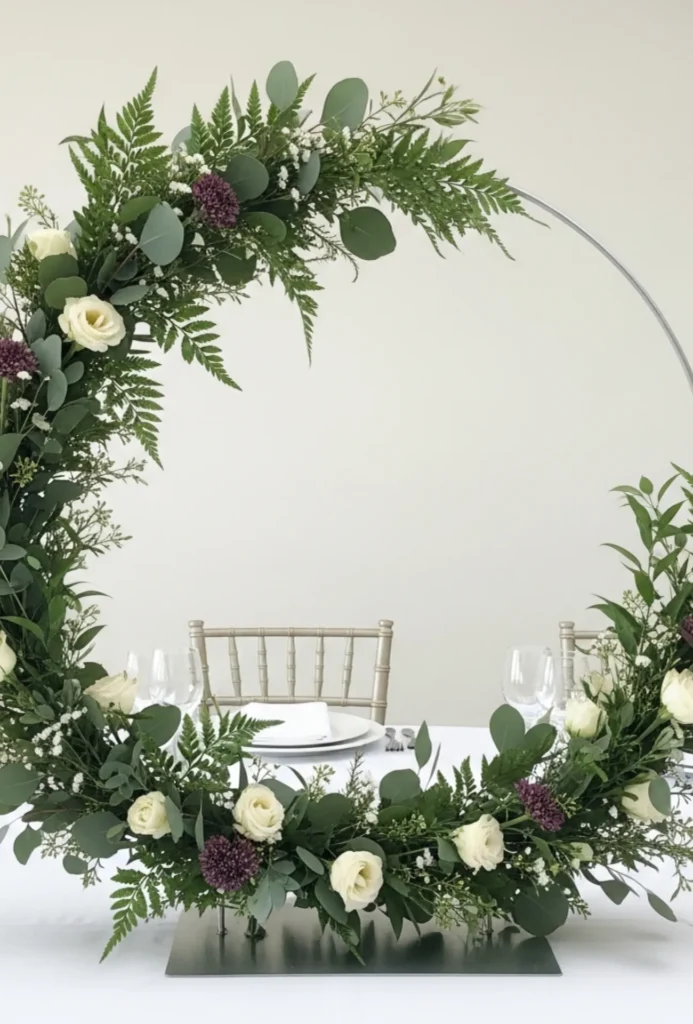

A circular metal or wooden hoop decorated with greenery and flowers is one of the most modern and visually striking DIY centerpiece formats.
Its clean geometric shape combined with organic floral softness creates a beautiful contrast that feels genuinely designed and considered.
Use a macrame ring, an embroidery hoop, or a wire circle as the base. Weave eucalyptus, ferns, and seasonal blooms through the ring by tying stems to the wire with fine floral wire or narrow twine.
Work around the full circle or concentrate the florals on one arc for a more asymmetrical, contemporary look.
Lay the finished hoop flat on the table as a ring framing a central candle or small vase, or stand it upright supported by a small prop for a different visual effect. Both orientations work beautifully.
- Use a 12 to 14 inch hoop for a table ring and 20 inches or larger for a standing version
- Mix greenery textures using both fine leaves and larger, bolder foliage shapes for depth
- Add dried flowers or seed pods for a more textural, organic quality
- Spray the finished hoop lightly with water to keep fresh elements looking crisp throughout the day
16. Fruit & Floral Still Life Arrangements
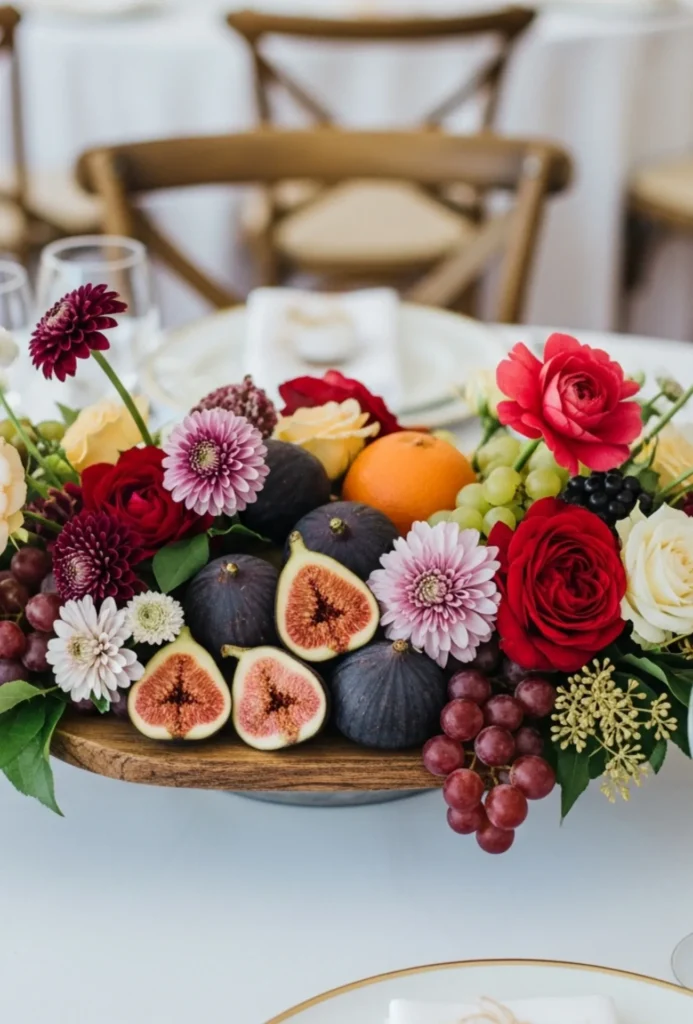
Combining fresh fruit with flowers in a single composition creates a centerpiece that feels generous, celebratory, and richly beautiful.
It has roots in centuries of still-life painting and the visual instinct behind it is entirely right: fruit and flowers together suggest abundance, pleasure, and the fullness of life.
Pile seasonal fruits generously in a wide bowl or on a flat wooden board and tuck flower heads and greenery stems throughout.
Figs cut to reveal their interior, clusters of grapes trailing over the bowl edge, pomegranate halves, and small citrus fruits all have incredible visual qualities alongside flowers.
The combination of fruit shapes, skin textures, and flower petals alongside greenery creates one of the most naturally beautiful compositions available. And it genuinely requires no formal floral skill, just an instinct for placing beautiful things together.
- Choose fruit at peak visual ripeness with good color, no bruising, and strong natural shape
- Tuck individual flower heads directly into gaps between fruit pieces for a seamlessly integrated look
- Add trailing ivy or greenery over the edge of the bowl for a romantic, abundant quality
- Replace any fruit that begins to deteriorate during a multi-day display
17. Asymmetrical Floral Designs (Organic Style)
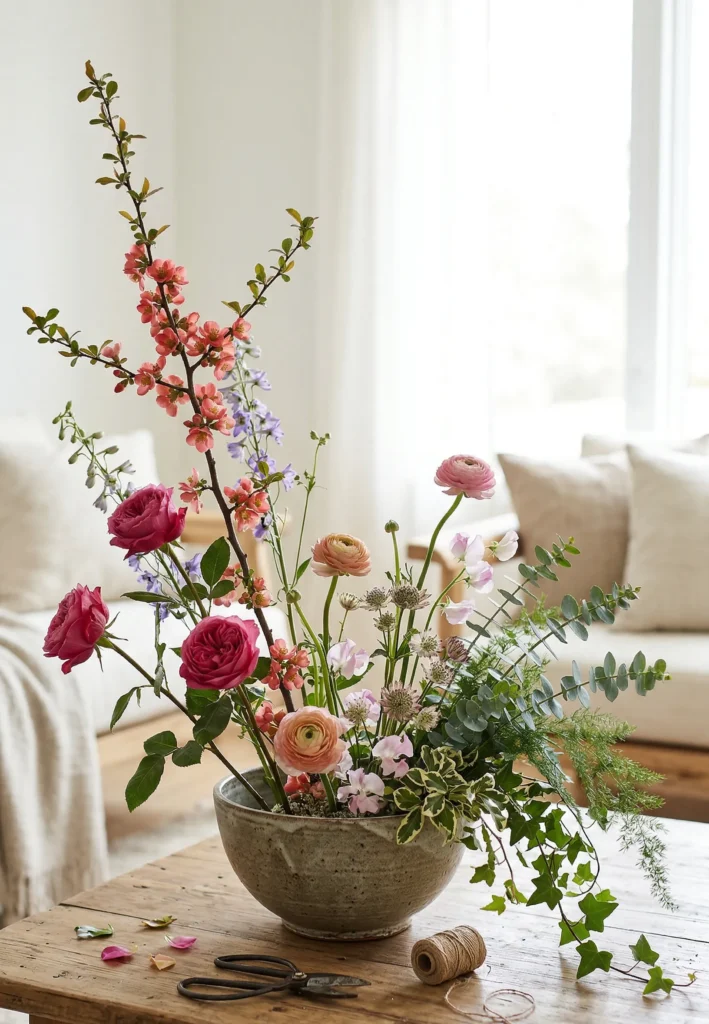
An asymmetrical floral arrangement deliberately builds height on one side while dropping lower and trailing on the other.
The result has a sculptural, organic quality that looks like genuine artistic intention rather than an incomplete arrangement.
Establish your tallest stem first, whether a dramatic branch, a tall allium, or a long-stemmed rose, and build the rest of the arrangement in relationship to that anchor.
Let one side reach upward and outward while the opposite side trails and cascades. The visual tension between the two directions creates genuine dynamic beauty.
This style suits home arrangers because slight imperfections actually enhance the organic quality rather than undermining it. The more natural and unforced the asymmetry looks, the more successfully it reads.
- Study the natural growth direction of each stem and work with it rather than forcing uniformity
- Leave deliberate open space within the arrangement so individual stems have room to be seen
- A heavy, grounded vessel balances the visual weight of an asymmetrical design effectively
- Step back frequently and adjust from a distance rather than working entirely up close
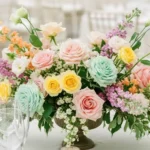
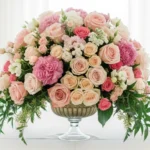
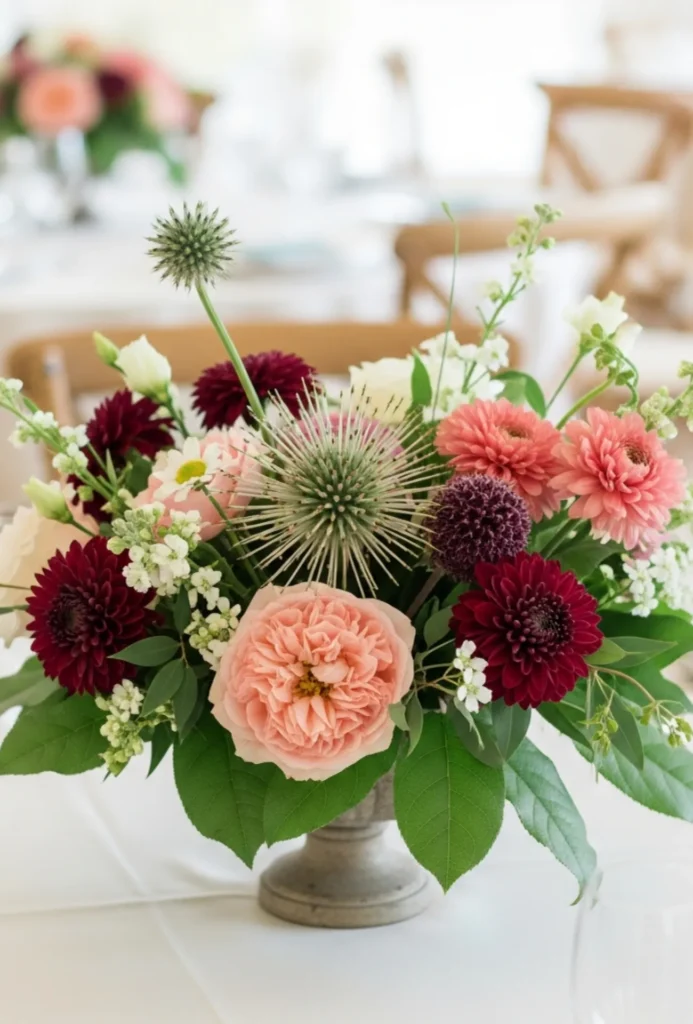
18. Low Floral Compote Bowl Arrangements
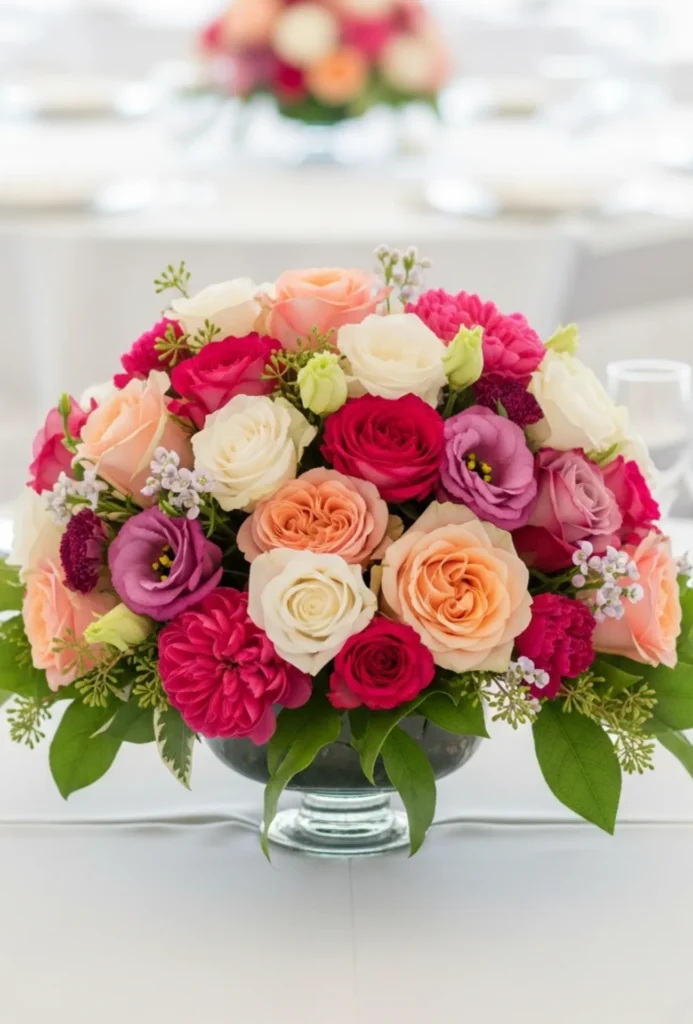
A low, wide compote bowl filled with a dome of tightly arranged blooms is one of the most classic and reliably beautiful DIY centerpiece formats.
It keeps the table feeling open and conversational while providing a genuinely generous and beautiful floral display.
Fill the compote with a water-soaked foam block or a small jar of water to support stems, then build a rounded dome of blooms working from the outer edge inward.
Include trailing pieces that spill slightly over the compote rim for a relaxed, garden quality that prevents the arrangement from looking too stiff.
Choose a compote vessel whose material suits your event. Silver for formal elegance, terracotta for rustic warmth, clear glass for versatility, and matte ceramic for a contemporary feel.
- Keep the arrangement dome slightly higher at the center for the most flattering, classic silhouette
- Include a few stems that extend well beyond the bowl rim for a full, overflowing garden quality
- Compote arrangements look spectacular when duplicated along the length of a long table
- Add a few trailing vine tendrils or ivy stems for a romantic, cascading element
19. Recycled Glass Bottle Flower Displays
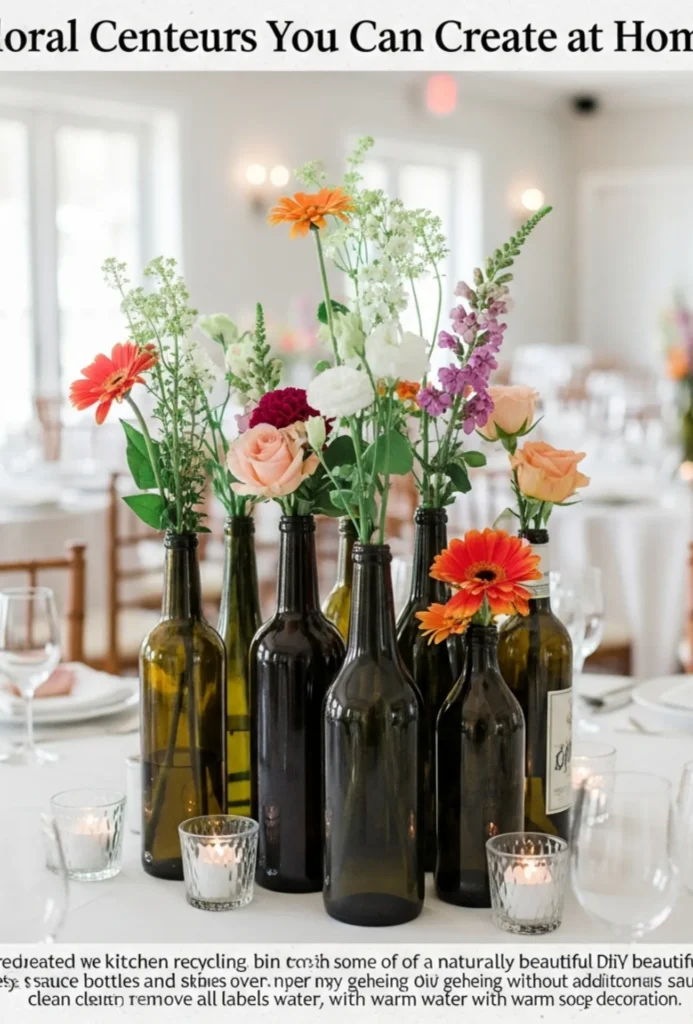
Cleaned and repurposed glass bottles from the kitchen recycling bin make some of the most naturally beautiful DIY floral vessels available.
Their varied heights, shapes, and glass tones create interest without any additional decoration.
Save olive oil bottles, sparkling water bottles, wine bottles, and sauce bottles over a few weeks before a gathering.
Clean them thoroughly, remove all labels with warm soapy water, and arrange them in a cluster on the table. Fill each with a few stems of varying flower types and the collection immediately looks like a considered, intentional display.
The beauty of this approach is that it costs nothing for the vessels, reduces waste in a genuinely useful way, and produces results that look stylish and completely deliberate.
- Remove labels cleanly by soaking in warm water with a few drops of dish soap
- Group bottles in varied heights so the cluster has visual movement and rhythm
- Leave some bottles with just greenery or a single plain stem for a more varied look
- Spray paint a few bottles in complementary colors for a more cohesive, styled cluster
20. Floral & Ribbon-Wrapped Vase Accents
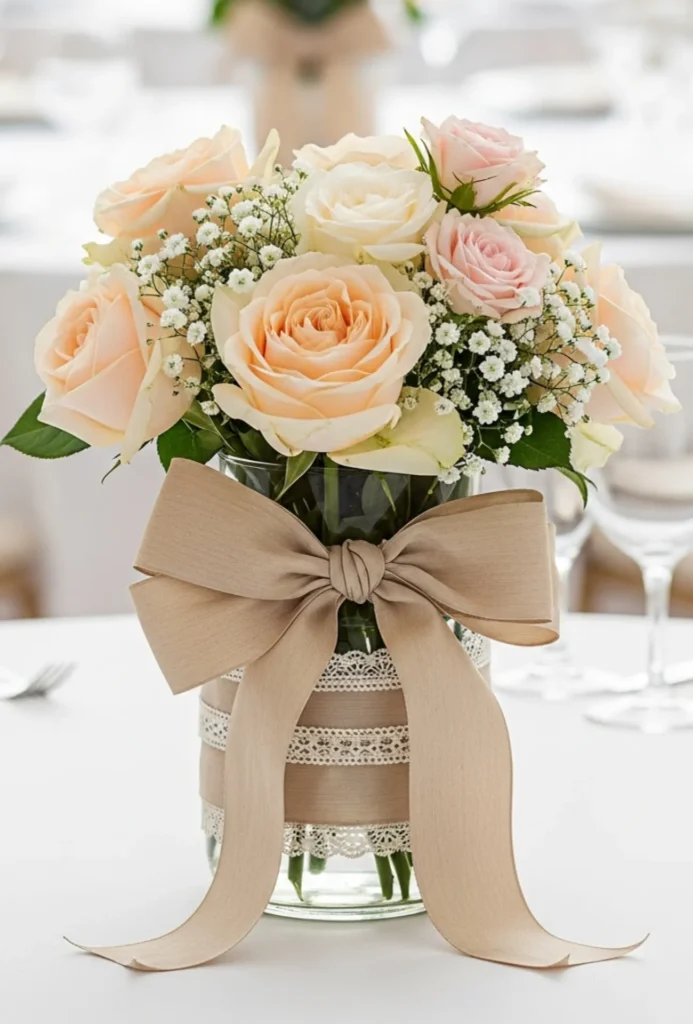


Wrapping ribbon around the exterior of a plain vase before arranging flowers inside it transforms a basic vessel into something that looks genuinely decorated and celebratory.
The combination of soft fabric ribbon and fresh blooms has a warmth and festivity that plain glass or ceramic alone rarely achieves.
Choose a ribbon in a material and color that complements the flowers inside. Wide silk ribbon tied in a generous bow around a simple glass vase holding soft garden roses creates something charming and complete.
Velvet ribbon alongside deep jewel-tone blooms adds luxurious depth. Fine lace ribbon on a small jar holding wildflowers feels gently vintage and sweet.
The wrapping takes two minutes and the result looks like considerably more effort was involved. It is one of the most effective quick upgrades available for a simple DIY centerpiece.
- Tie the bow generously with long, trailing ends rather than cutting it short and neat
- Mix two complementary ribbon types, such as a wide satin and a narrower sheer organza
- Choose ribbon colors that echo rather than exactly match the flower palette
- Secure ribbon at the vessel neck rather than the middle for the most elegant proportion
21. Ikebana Inspired Minimal Arrangements
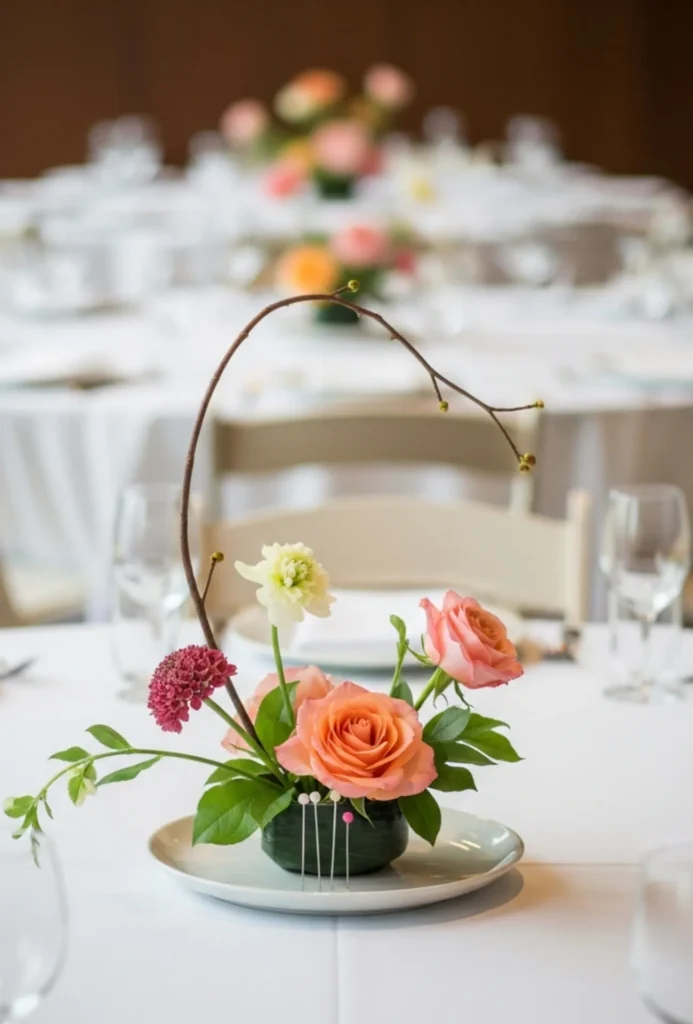
Ikebana is the Japanese art of flower arrangement and its emphasis on negative space, asymmetry, and the beauty of individual stems creates arrangements that feel like sculpture as much as florals. The results are meditative, precise, and genuinely extraordinary in their restraint.
Choose just two or three stems placed with complete deliberation.
A single curved branch, one open bloom, and a few leaves arranged in a shallow dish with a pin holder creates a composition that has the quality of a considered drawing. Every stem is visible, every angle chosen with intention.
The empty space around the stems is treated as an equal part of the composition. This approach to arranging at home is both deeply calming to practice and produces results that are unlike anything a more conventional approach can achieve.
- Use a kenzan pin holder as the base for precise, stable stem placement
- Place the arrangement off-center within its vessel rather than in the conventional middle
- Curve stems gently by hand to create more interesting lines and directions
- Ikebana rewards slowness. Place one stem, step back, and consider it fully before adding the next
22. Floral Arrangements with Branches
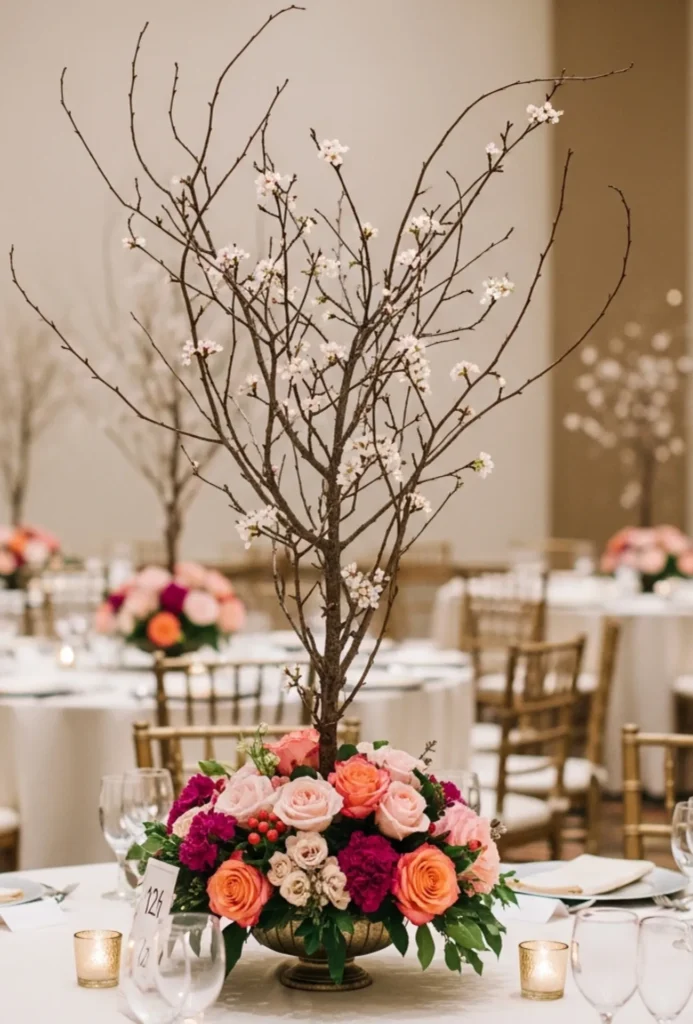
Adding a flowering or bare branch to a floral arrangement gives it instant height, architectural drama, and an airy quality that conventional flower stems alone cannot provide.
Branches transform the scale of an arrangement and create a sense of landscape and sky above the blooms.
Establish the branch as the tallest element of the arrangement first, securing it firmly in a weighted vessel. Build the floral arrangement around and below the branch, keeping the lower section generous and full while letting the branch reach upward into open space.
The contrast between the dense lower florals and the reaching branches above creates a visually complete arrangement with genuine presence.
Source branches from the garden: cherry blossom in spring, apple blossom in early summer, contorted willow year-round, or interesting bare branches in autumn and winter. They cost nothing and add extraordinary beauty.
- Cut branch stems at a sharp diagonal and split the ends vertically for better water uptake
- Condition branches in deep water for several hours before using in arrangements
- Cherry blossom branches cut at early bud stage will open progressively throughout the event
- Bare branches can be spray-painted white or gold for a decorative, non-naturalistic version
23. Seasonal Local Flower Centerpieces
Using only what is locally in season at the time of arrangement creation produces florals that feel honest, connected to their moment in the year, and genuinely beautiful in a way that imported out-of-season flowers rarely match.
Visit a local farmers market, a garden center, or simply walk the garden with scissors on the morning of a gathering.
Spring offers tulips, hyacinths, blossom, and ranunculus. Summer brings roses, lavender, sweet peas, and dahlias. Autumn gives chrysanthemums, marigolds, and rosehips. Winter offers hellebores, evergreen branches, and berried stems.
Working seasonally also keeps costs low and the arrangement always feels timely and appropriate in a way that carefully engineered imported blooms sometimes do not.
| Season | Best Local Flowers | Supporting Foliage |
| Spring | Tulips, ranunculus, sweet peas, hyacinths | Blossom branches, fresh ferns |
| Summer | Roses, dahlias, lavender, cosmos | Eucalyptus, herbs, grasses |
| Autumn | Chrysanthemums, marigolds, scabiosa | Rosehips, seed heads, berries |
| Winter | Hellebores, amaryllis, cyclamen | Evergreen, holly, berried stems |
24. Floral & Greenery Simple Bunch Styling
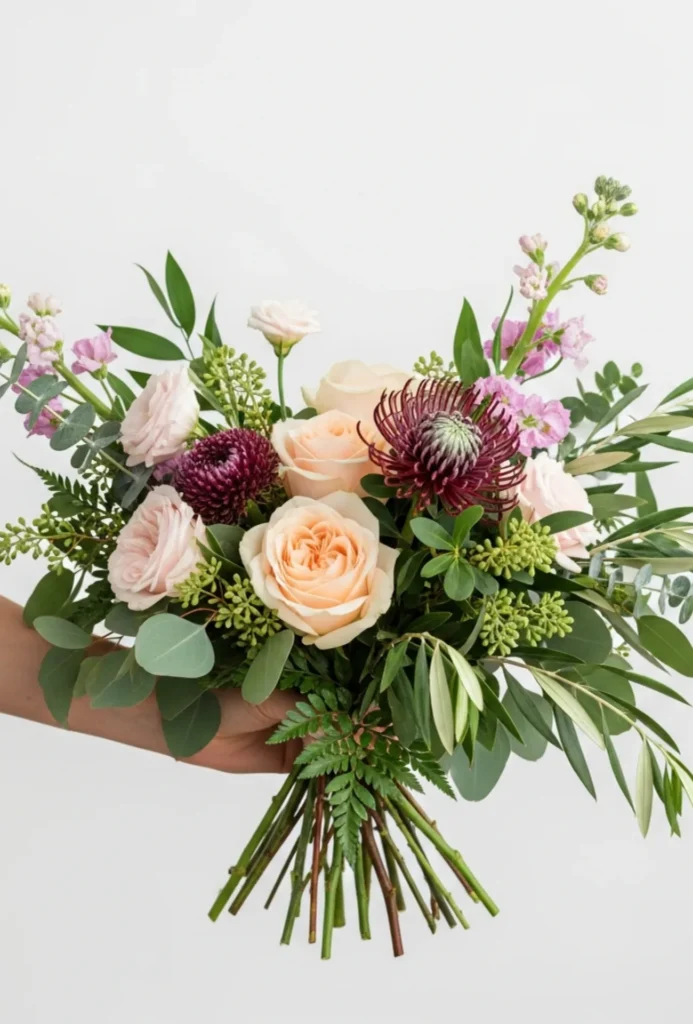
Sometimes the most beautiful DIY centerpiece is simply a well-chosen bunch of flowers combined with generous greenery, placed in a good vessel without overthinking. A simple bunch styled with intention looks genuinely complete and beautiful.
Choose two or three flower types that complement each other and combine with two types of greenery. Eucalyptus, ruscus, ferns, or olive branches all work beautifully as greenery partners.
Hold the bunch loosely in your hand, rotating it as you add each stem so the arrangement builds naturally in a spiral. Place in the vessel and adjust only what is clearly necessary.
The most important skill in simple bunch styling is knowing when to stop. Over-adjustment is the most common reason a simple bunch loses its natural beauty.
- Build the bunch holding it loosely in your hand rather than arranging directly in the vessel
- Rotate the bunch a quarter turn with each stem added for the most natural spiral structure
- Add greenery generously as the foundation before adding focal flowers
- Trim all stems to a consistent length at a sharp diagonal before placing in the vessel
25. Wooden Box Floral Arrangements
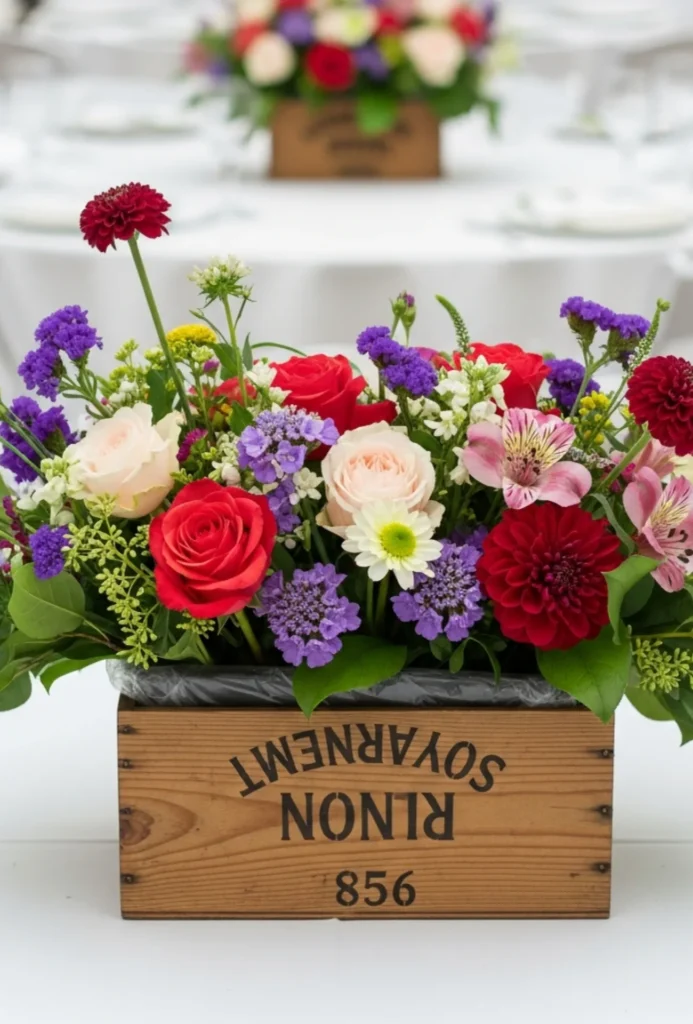
A wooden box, whether a vintage wine crate, a painted craft store box, or a simple found wooden container, makes a centerpiece vessel with genuine character and warmth. The natural wood grain and the contained, defined shape of the box creates a beautifully framed environment for flowers.
Line the inside of the box with a plastic bag or small waterproof container before adding flowers, protecting the wood from moisture.
Fill with a generous arrangement of seasonal blooms in a loose, slightly overflowing style that spills naturally over the box edges. The overflow quality is what makes this arrangement so beautiful and abundant-looking.
A long rectangular wooden box used as a floral runner along the center of a table is one of the most striking and effortlessly beautiful DIY centerpiece formats for a dinner or celebration.
- Distress a new wooden box with sandpaper and a light paint wash for a more vintage quality
- Use chalk paint in white or grey on a plain wooden box for a more contemporary aesthetic
- Mix flower types generously within the box so the arrangement looks lush and naturally varied
- Add a few candles nestled among the flowers inside the box for an evening dinner version
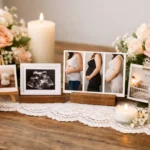
26. Pressed Flower Frame Centerpieces
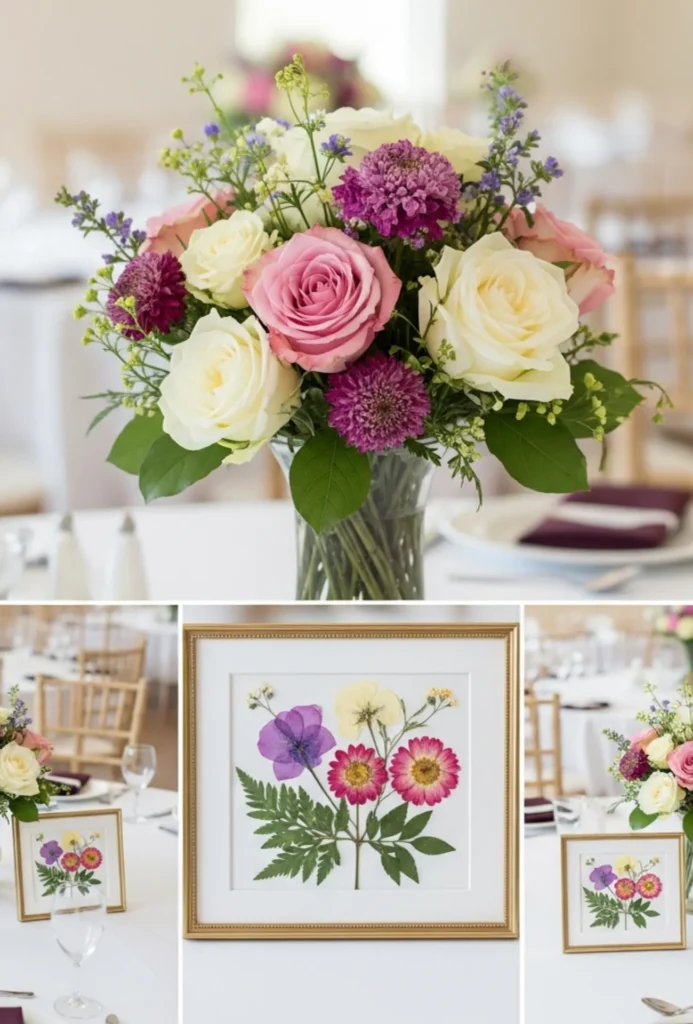
A small frame containing beautifully pressed flowers is a centerpiece that sits at the intersection of floral art and personal keepsake. It has an extraordinary delicacy and a quality of preserved beauty that feels genuinely meaningful.
Press flowers between sheets of parchment paper inside heavy books for two to three weeks until they are completely flat and dry.
Arrange the pressed flowers on white or cream cardstock inside a small frame using a tiny amount of craft glue to secure each piece. Create a composition that feels natural, as though the flowers fell into position rather than being placed.
Group several small pressed flower frames together as a table centerpiece cluster, or stand a single larger frame as a focal point surrounded by small candles and loose petal accents.
- Choose flowers with interesting shapes and colors that retain vibrancy when dried
- Pansies, violas, ferns, and small roses all press exceptionally well
- Layer pressed petals at slightly different angles rather than laying everything perfectly flat
- Pressed flower frames make beautiful take-home gifts for guests after a celebration
27. Floral & Lace Wrapped Jars
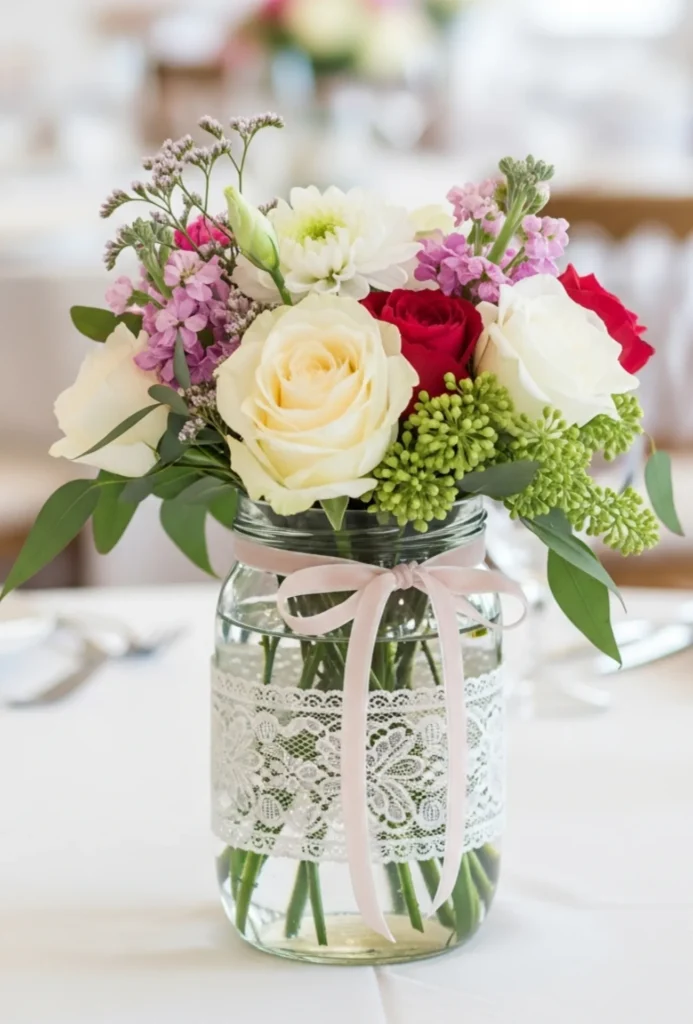
A clean glass jar wrapped partially or fully in lace trim and filled with a small floral arrangement is one of the most romantically charming DIY centerpiece options available.
The combination of vintage lace texture and fresh flowers is soft, feminine, and genuinely beautiful.
Cut lace trim to the circumference of the jar and secure with a small line of hot glue along the back seam. Tie a satin or velvet ribbon over the top edge of the lace for a finished, layered look.
Fill the jar with water and arrange a small bunch of sweet peas, roses, ranunculus, or any delicate small-scale flowers.
Group three to five lace-wrapped jars of varying sizes together as one centerpiece cluster and the combined effect is warm, handmade, and utterly charming.
- Use lace trim in ivory, cream, or white for the most versatile and elegant result
- Layer two different lace patterns together for a richer, more textured look
- Choose ribbon colors that complement the flower palette rather than matching exactly
- Lace-wrapped jars suit vintage, romantic, and garden party aesthetics particularly beautifully
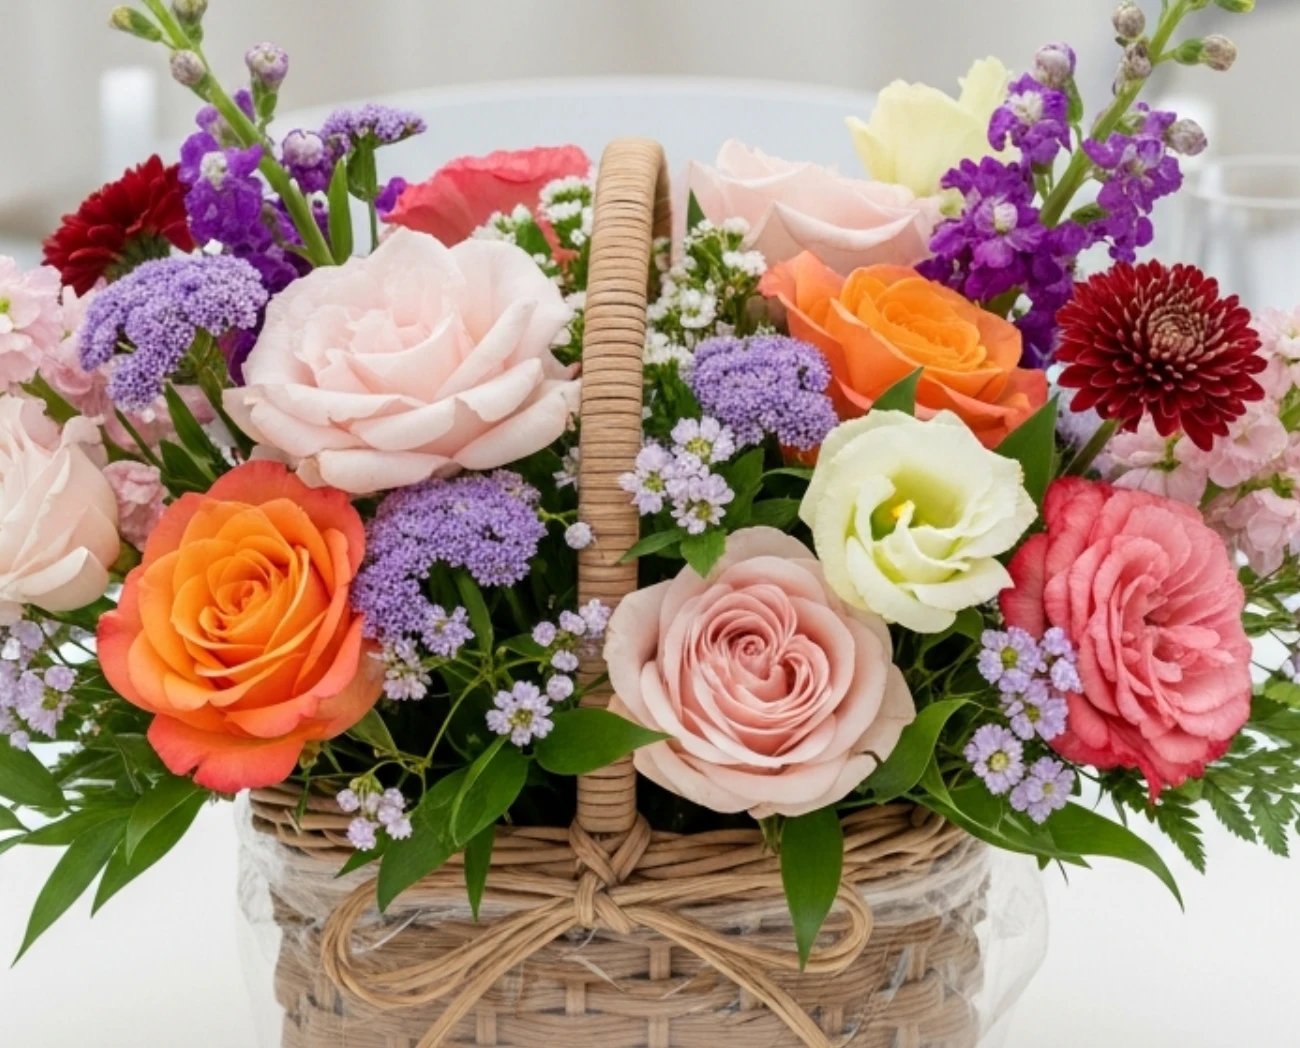
28. Mini Basket Floral Arrangements
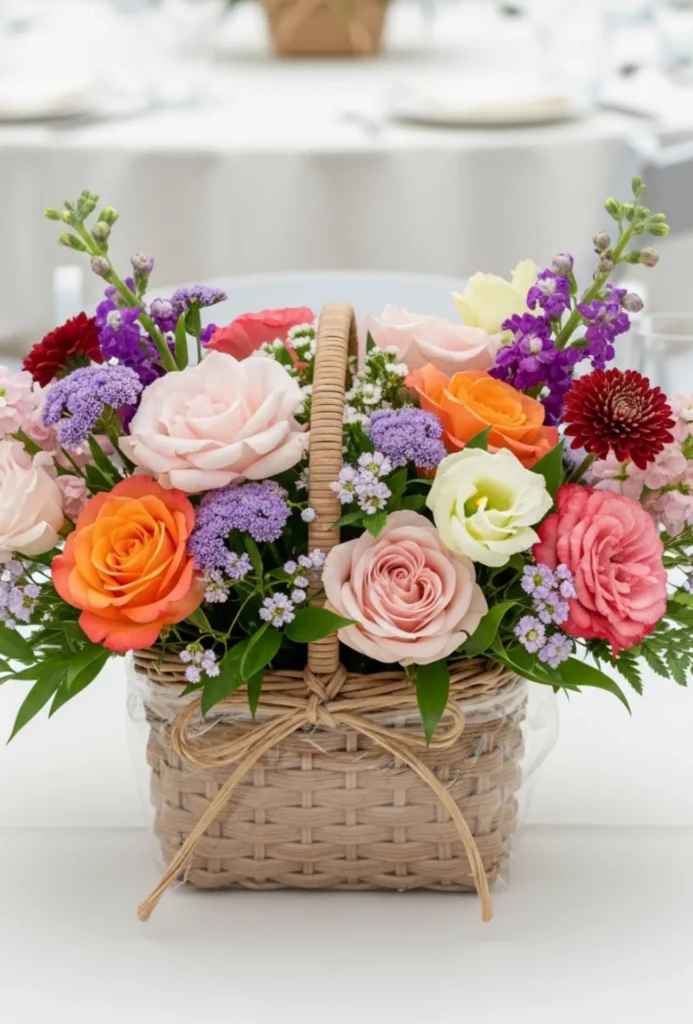
A small woven basket filled with flowers has an immediate charm and warmth that no glass or ceramic vessel quite replicates.
The natural woven texture grounds the arrangement with an earthy, organic quality that makes flowers look genuinely at home.
Line a small basket with a plastic bag, a jar, or a waterproof liner and fill with a generous arrangement of seasonal blooms.
Allow the flowers to spill slightly over the basket edges in all directions for the most natural, gathered quality. Tie a simple ribbon around the basket handle for a finished touch.
Cluster three small baskets of different sizes together as one centerpiece grouping or use a single larger basket as a standalone statement piece. Either approach produces something warm, personal, and completely inviting.
- Choose baskets in natural wicker, painted wood, or woven seagrass for varied textural interest
- A low, wide basket suits sprawling arrangements while a tall, handled basket suits upright bunches
- Include herbs alongside flowers in basket arrangements for an authentic country garden quality
- Small baskets make wonderful take-home gifts filled with flowers at the end of a celebration
29. Loose “Fresh Picked” Garden Bloom Displays
The most beautiful and effortless DIY centerpiece of all is a casually gathered bunch of whatever is most beautiful in the garden or at the market on the day of the gathering.
The fresh-picked aesthetic celebrates immediacy, seasonality, and the simple pleasure of flowers that were living in the garden just hours before.
Gather stems with their natural irregularity intact. Include a few leaves, an interesting seed head, a not-quite-open bud, and perhaps one stem that is slightly taller or longer than the rest.
Place in a simple vessel without excessive rearranging. The arrangement should look like it arrived at the table still remembering the garden.
The fresh-picked aesthetic is the most honest and in many ways the most beautiful of all DIY floral approaches.
It requires no special skill, no expensive tools, and no formal training. It requires only attention to what is beautiful and the confidence to let that be enough.
- Gather flowers in the early morning when stems are most hydrated and blooms are freshest
- Include one or two non-flower elements like a herb sprig, a berry stem, or a grass frond
- Use a vessel that feels as natural and unforced as the arrangement itself
- Resist the urge to perfect or over-adjust what looks beautifully and naturally gathered
Of all the things you can make with your own hands for a home or a celebration, a fresh floral arrangement is among the most immediate and rewarding.
The materials are natural, the process is calming, and the result genuinely transforms any space it enters.
Which of these 29 DIY ideas feels most achievable for you right now, and do you think there is something about making your own centerpiece, rather than buying one, that changes how the whole table feels?